
· By katie masters
HOW I AM PACKAGING MY PRESS ON NAILS
*note, I may receive commission on chosen links below*
Packaging and Shipping of My Press On Nails
Okay fellow nail techs, now that we have talked about the two main ways to size your press on tips and they way I am sizing mine, (highly recommend checking that press on nails blog out first if you haven’t already), I want to talk about packaging, shipping, and what I am including in every press on nail pack, because like I said before, I had no idea where to start with all of these press-on nails and I'm sure some of you are feeling the same confusion right now too. Let's go!
If you don't know me yet, hi! My name is Katie Masters aka @nailthoughts on instagram. I am a nail tech who owns a private nail salon in Santa Monica, CA. I just dove right into making press on nails, and for the last 6 months of me being shut down and locked out from the virus I have had a pretty decent amount of time to work some of the press-on nails kinks out and I am here to help shed some of the lessons so you don't have to learn the hard way of making press on nails like I did!
PRESS ON NAILS PACKAGING
First of all let me tell you, this was one of the most stressful parts of this whole new press on nails venture. It almost held me back from launching in the first place because I couldn't find anything cute enough and I’ve also never shipped stuff before and that type of stuff stresses me out because I always think I’m going to do something wrong.
So when I first launched I displayed the press on nails in a line on strips of a paper bag. I used a putty as adhesion, only because I didn’t want a tape to show. Then I printed sheet after sheet of instructions on my printer (nothing cute, just looks like how this blog post looks) and had to cut each individual sheet out which added so much time. When I sent the press on nails out, I got feedback that the putty was hard to get off from the press nails and that it turned sort of gummy. So I had to quickly turn around before the next launch two weeks later and figure out a different way to send them.
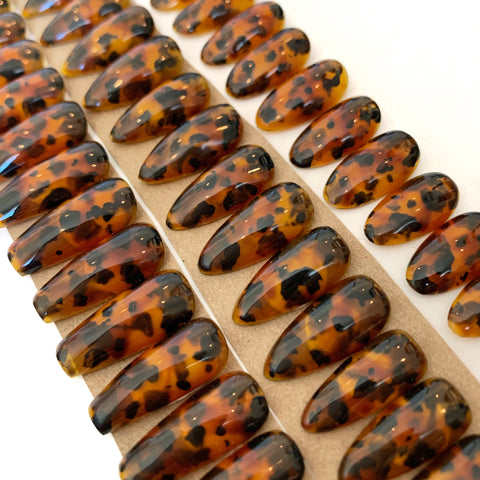
Pictured: How I originally displayed and sent my press on nails. Cute and crisp for pictures, but not consumer friendly.
My second round was a little bit of a last minute panic and I just decided to put the press on nails in a little hand folded pouch out of my tissue paper scraps with one press-on nail displayed on the outside. Also cute, but not the wow factor I wanted and omg SO much work to fold those cute lil baby pouches.

Pictured: The hand folded press-on nail pouch out of my tissue paper.
Also, I literally had to have my parents come over just to help me fold the nail pouches because I was so behind on actual press on nails since I was so distracted with packaging. Biggest mistake was only allowing myself two weeks to do all of this between the first and second launch.
FINALLY- we have made it to my about-to-launch third round and OH BOY. I hope you are ready for this. I really wanted my clients/customers to feel beyond special when they opened this package. I love the idea of press on nails being displayed but the double sided sticky tape was driving me nuts, and 22 press on nails to display is pretty long.
A lot of people were using little necklace jewelry boxes to display their press on nails, which I thought was so cute, but I wasn’t sure how I would include my strip of press on nails, my large-ish manicure pack, and instructions also inside that little box without it overflowing.
OKAY SO, you know how all of those influencers get the coolest PR packages from hair brands, makeup brands, etc.?? And then you go to purchase and you realize oh, those special cute boxes aren’t for us I guess :( .
I wanted think of something SUPER cute and special for everyone to open and literally feel like they got a super cool press on nails PR box. Because THAT’S WHAT WE DESERVE. Obviously. But I wanted the press on nails package to also still be pretty eco friendly and minimal waste as well. I'm always up for a challenge.
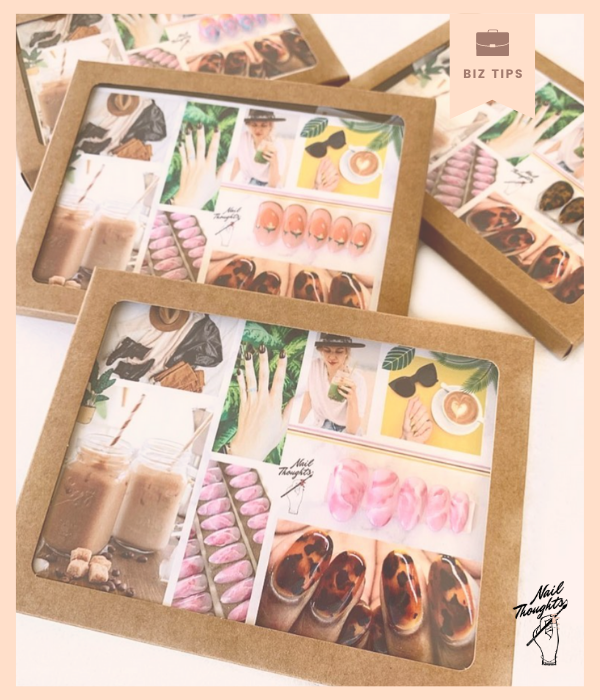
So since I love making mood boards, it sorta hit me that why don’t I make a Nail Thoughts mood board with a tiny open slot to display just five press on nails, and go from there to see how to finish up the rest of the packaging aspects. A mood board is so freaking cute and exciting and if people saw their press on nails in the middle of one, I mean, I think that really sets the excitement level and vibe up a million notches!!!! So here we are. Then I realized I can even print the instructions on the back of the card too. Already saving me so much time with printing and cutting!

Pictured: The mood board I made on Canva with the blank space that I was hoping would fit 5 press on nails!
Next I got about 100 of the mood board cards printed from a company called Snapfish . I got them printed in 5” by 7” prints and just hoped they would turn out okay. I’m sure there are other places to print things but idk I've gotten prints done there before and I remembered it was pretty fast so here we are! Also it's one of those places that always has like 50% off codes for no reason so I took advantage! And wow they turned out great.
BOXES FOR THE PRESS ON NAILS
So next was figuring out the boxes to display the press on nails in and I found these! They are made from recycled material and are the perfect size for my cards and press-on nails! So I quickly ordered about 100 of those as well as these clear baggies from the same website that are compostable to hold the rest of the press on nails in!


Pictured: Brown window boxes made from recycled material linked here. And clear “plastic” compostable baggies linked here .
So here is the final look of the press on nail package together! It's so cute I CAN'T TAKE IT AHHHHH. 
Now, here is a list of everything I am including in my press on nail kits for my clients/customers inside this box:

- 22 PRESS ON NAILS (see my press on sizing blog if you want more details on this)
- 1 nail glue per kit ( I bought a box of 250 pieces here)
- 1 sheet of double sided stickies for more temporary press on wear linked here
- 1alcohol wipe ( the pack I bought can be found here)
- 1 small Nail Thoughts sticker as a customer bonus gift. I order from here, because holy wow. I have my stickers on my reusable cups, my water bottles, etc. and they have weathered months and months of dishwasher cycles with no problem. Highly recommend.
- 1 manicure kit with a file, buffer, and orange wood stick ( here is an amazon link to a box of 100!)
PRESS ON NAILS SHIPPING
Now that I have my cute PR box for everyone, I will show you how I am shipping it!
I got myself some custom compostable tissue paper and compostable mailers!!


So cute and so eco friendly. Here is an amazon link for some compostable mailers !
So since the mailer is pretty thin and I want my boxes to be a little bit protected without any bubble wrap or excess anything, I am folding my tissue paper into larger pouch-like bags, and stuffing it with shredded paper! Literal DIY bubble wrap cushion. HOW EASY IS THAT.
Get yourself a paper shredder and start shredding up old magazines, paper bags, newspaper, etc and now you have just saved so much money on stuffing, protected your package, AND up cycled all the paper lying around your house!!! Honestly the shredding turns out so cute too. Like look at this-


Seal it with another sticker for emphasis and boom! DONE! I ordered those label stickers at the same place I ordered my client gift stickers by the way.

Now let me show you a quick price breakdown of all of these items I include in my package to show you how much it costs me per shipment!
WINDOW BOX (I ordered 100) - $.47 each
MOOD BOARD CARD (I ordered 100) - $1.14 each
CLEAR BAGGIE ( I ordered 100) - $.06 each
TISSUE PAPER (I ordered 250 sheets)- $.50 each
COMPOSTABLE MAILER (I ordered 250) -$.38 each
NAIL GLUE (I ordered 250)- $.25 each
PRESS ON STICKIES (1 pack of 10 sheets)- $.43 per sheet (w. NT10 discount code)
MANI KIT (I ordered 100)- $.22 each
NAIL TIPS (I do 22 nails per set)- $1.76
CIRCLE NAIL LABEL STICKER (I ordered 300)- $.30 each
SMALL NAILTHOUGHTS STICKER GIFT ( I ordered 200)- $.40 each
ALCOHOL WIPE ( I ordered 200) - $.09 each
_______________________________________________________________+
TOTAL- $6.00 PER PRESS ON NAILS PACK !
I charge $90 for most of my designs so therefore I have a great profit margin! Make sure and do this type of math for your products as well to help figure out what it costs you to make, then charge for your time it takes you to make the press on nails on top of this. Good news is I did some of the math for you on these products if you decide to use!
WHEW, you made it to the bottom. Here is one final amazon link to other important things I bought like shipping labels, label printer, shipping scale etc. You're going to need those if you ship things out!
I really hope this press on nails packaging helps guide you in any way! And again don't forget to check out my other blog of how I am sizing my press-ons as well so you can figure out how YOU want to approach this.
I am going to go take a nap now after all of that math :)
Love you all!!!!! GOOD LUCK!!!
This is the secret sauce I needed. Thank you for sharing
Nailz by Lopez on
elise on
Karlene on
Thank you so much for this info! I have been looking for cute packaging. Thanks to you, I found more of what I was looking for than on another site and it is the same price. I’m also loving your idea of a vision board as well. It already gave me an idea of what to do. Thanks again for all the work you put into this!
Oveda on
Kat on
Jess on