
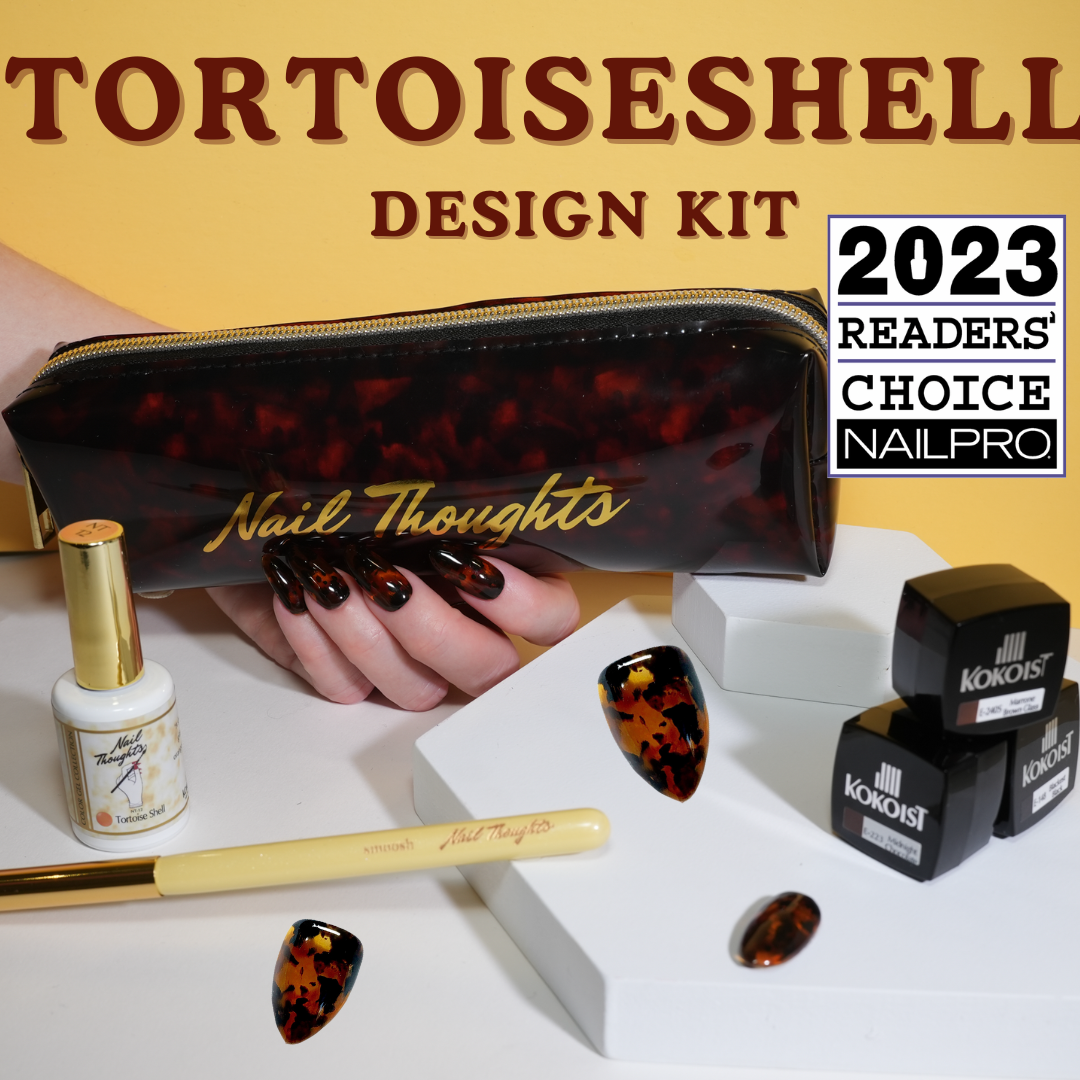


Tortoise Shell Color Gel Design Kit
WE FINALLY HAVE THE PERFECT TORTOISE SHELL COLOR. But why not make the tortoise design even easier with this whole tortoise design KIT? This color kit comes with everything you need for a perfectly glassy tortoise nail art design. The gel colors for nails included in this kit are Tortoise Shell, Blackest Black, Marrone Brown Glass, and Midnight Chocolate. But of course, you need the perfect tool to create the natural and loose tortoise shapes, so this kit also includes the Nail Thoughts Smoosh Brush.
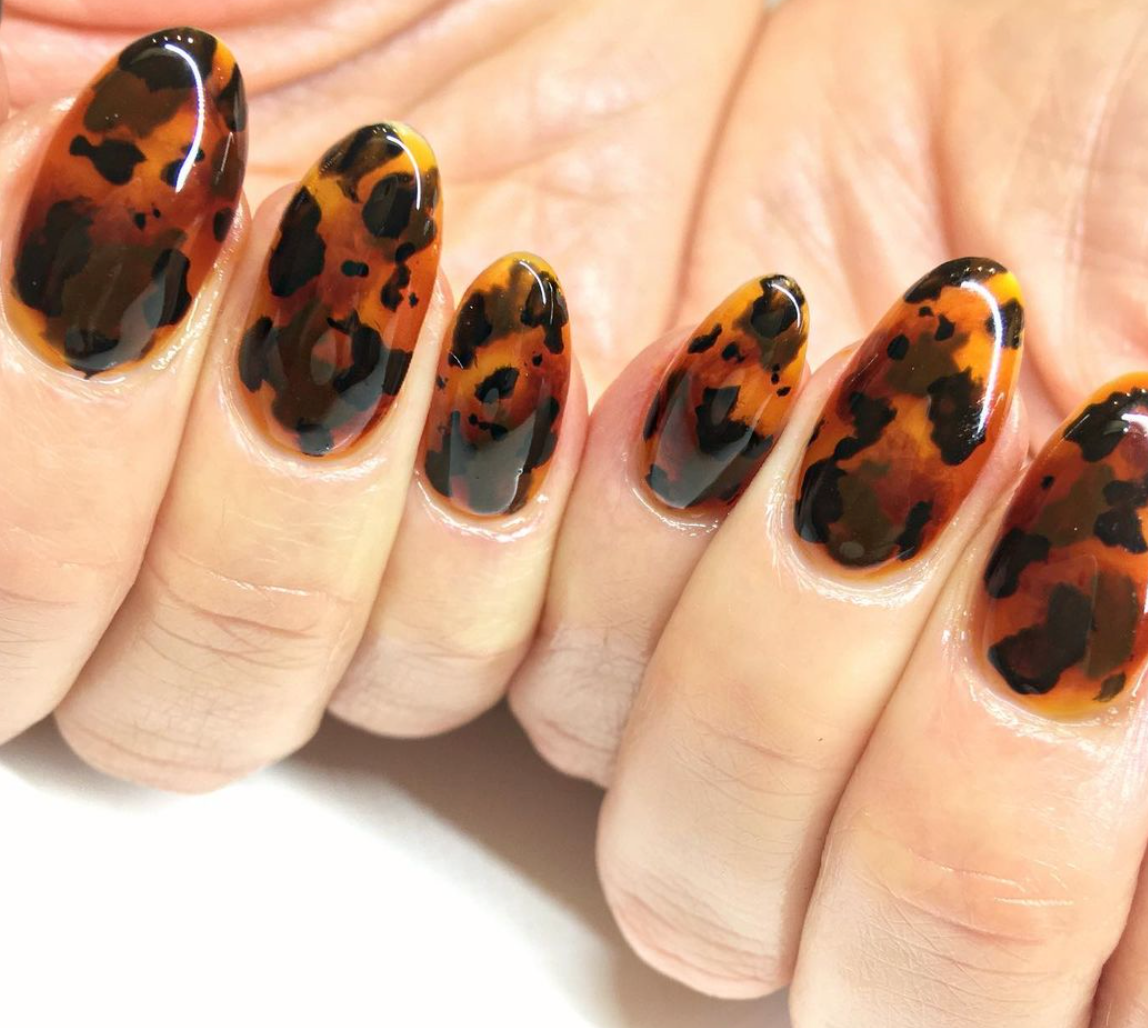
These colors layered and smooshed together will create the perfect glassy and natural tortoiseshell nail art of your dreams and make your life so much easier!
Additional Details
TIPS AND TRICKS
How to Rock the Tortoise Shell Color and Design Kit
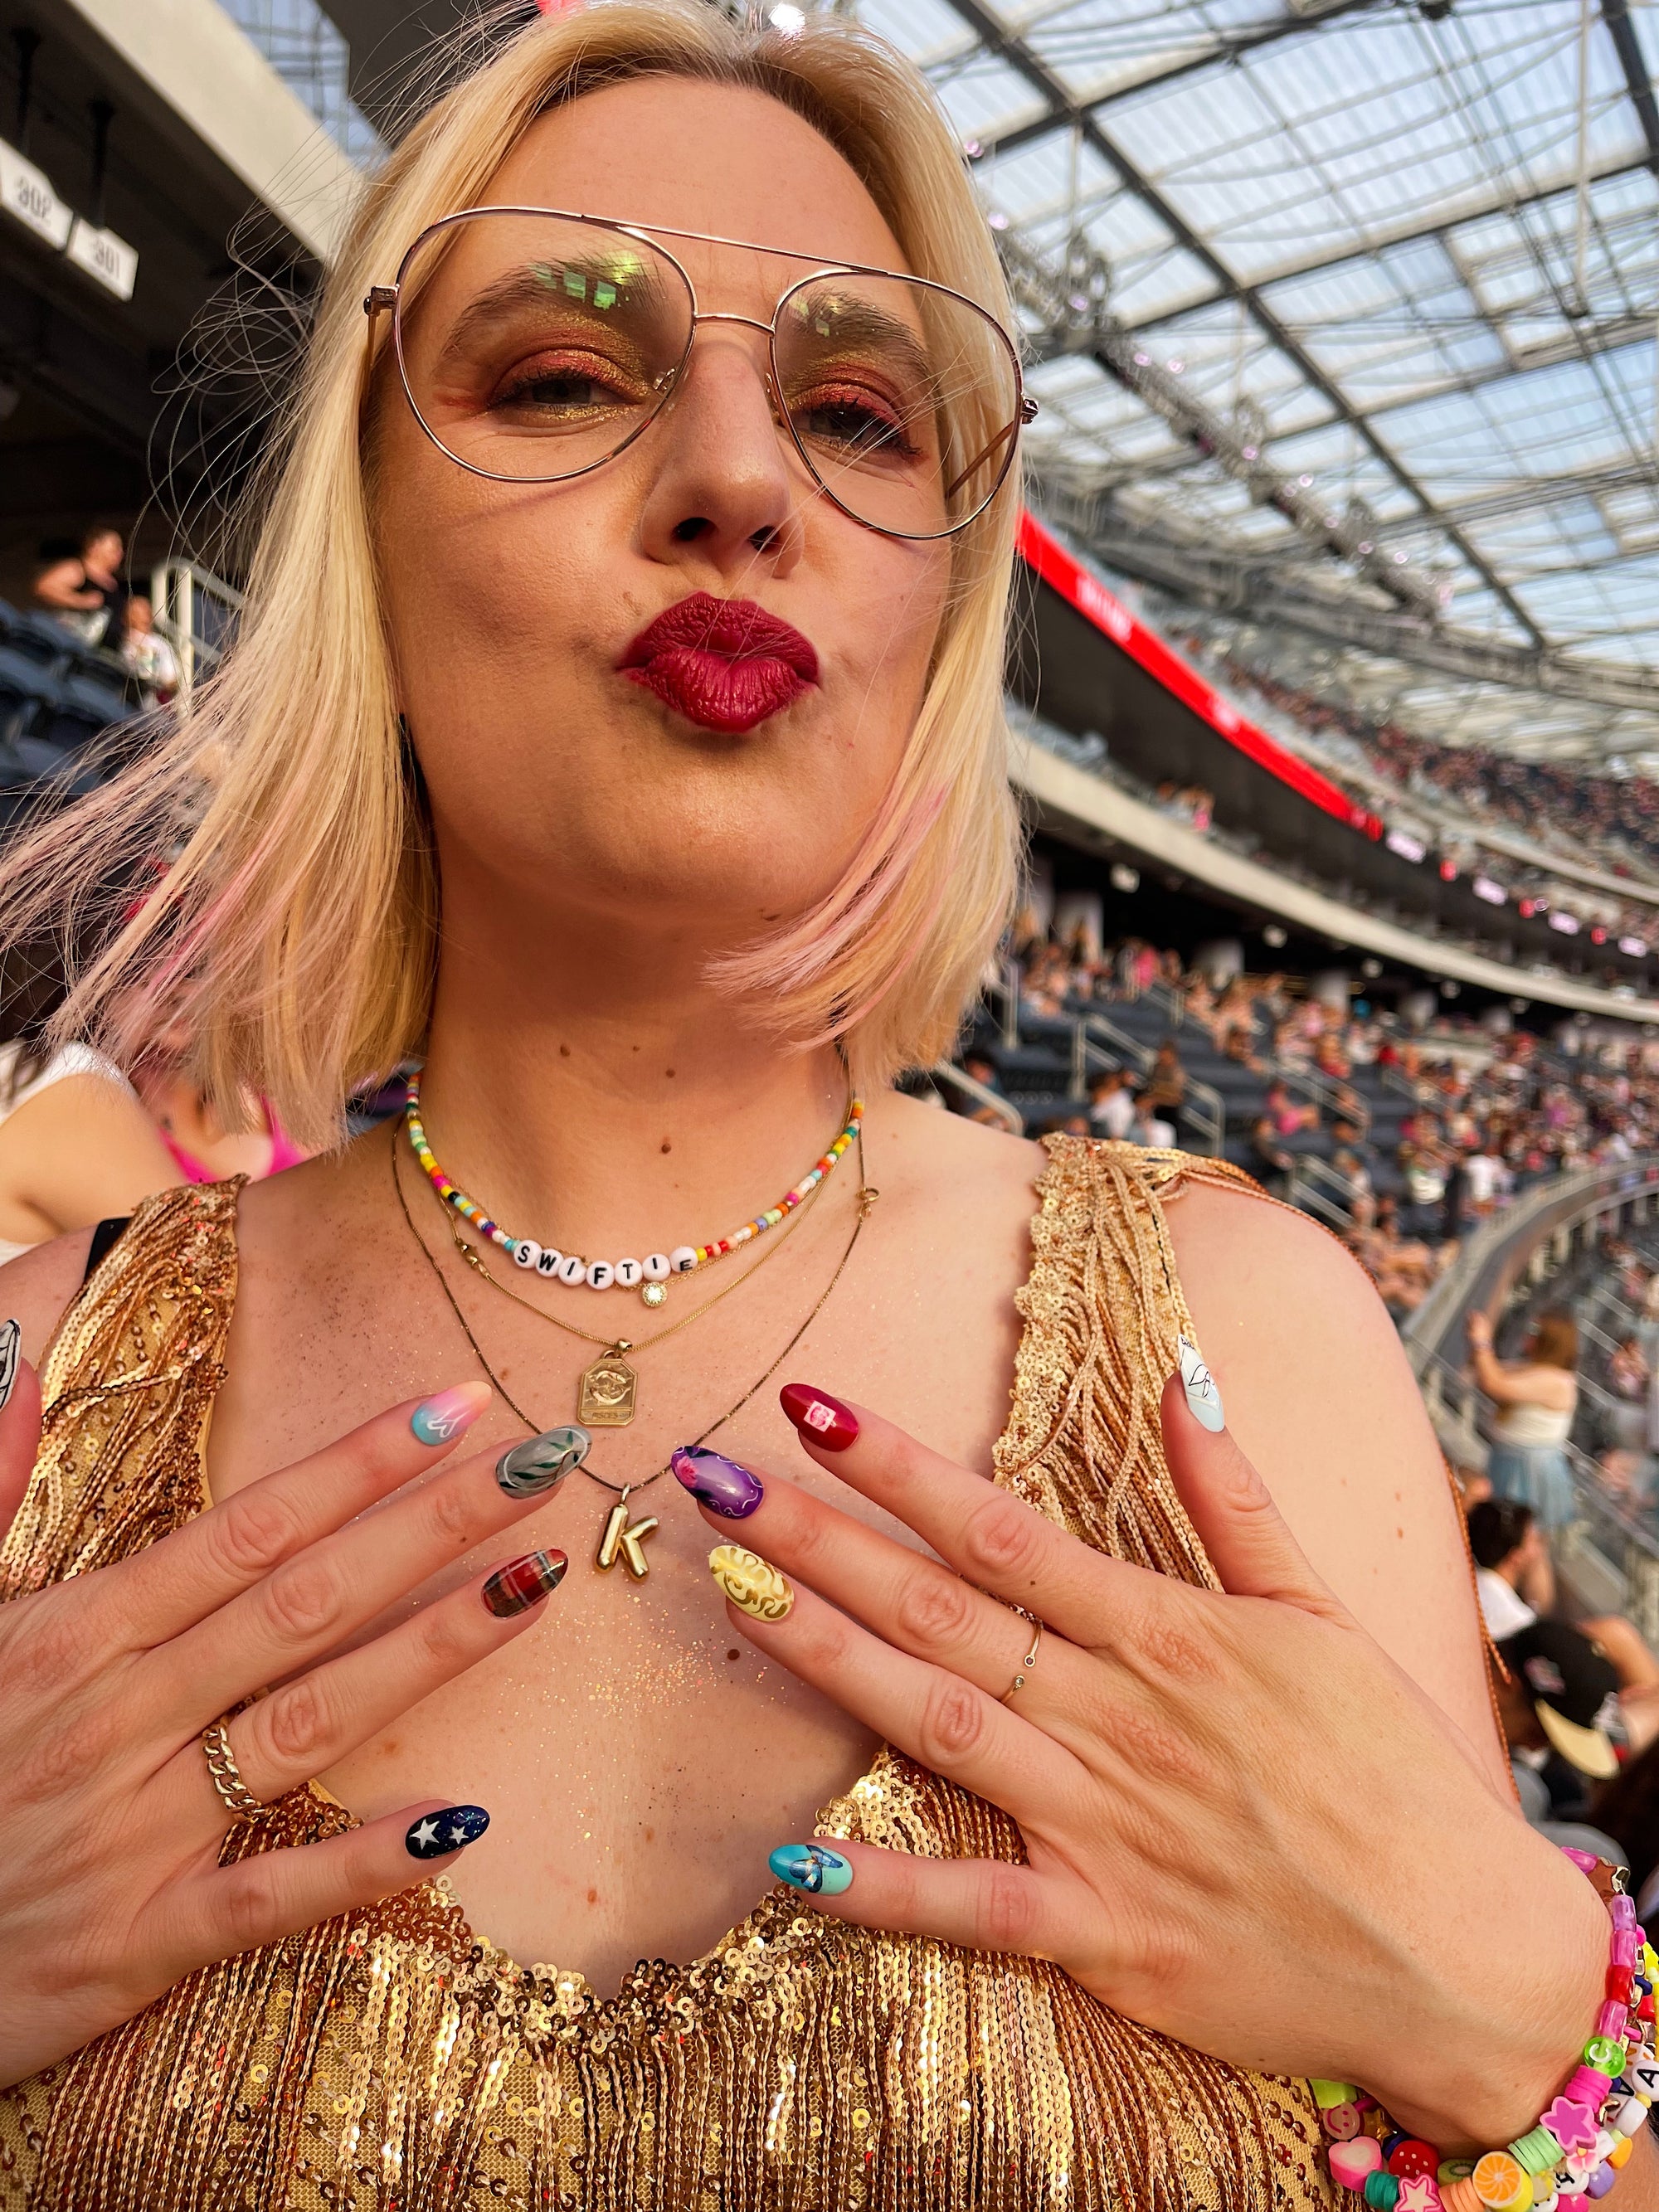
If you’re new here, hi! My name is Katie Masters. I am a nail artist with my own private salon in Santa Monica, CA.
I started experimenting with the tortoiseshell manicure on my clients back around 2015! I remember absolutely falling in love with the design but taking forever to actually master it! I was always completely overthinking, and trying to figure out how many weird yellow brown colors I needed to achieve it. And also, where are you supposed to get a sheer yellow brown color???!
If you're a social media-savvy nail art enthusiast, you’ll probably remember the tortoiseshell nail art becoming a trend on Instagram.
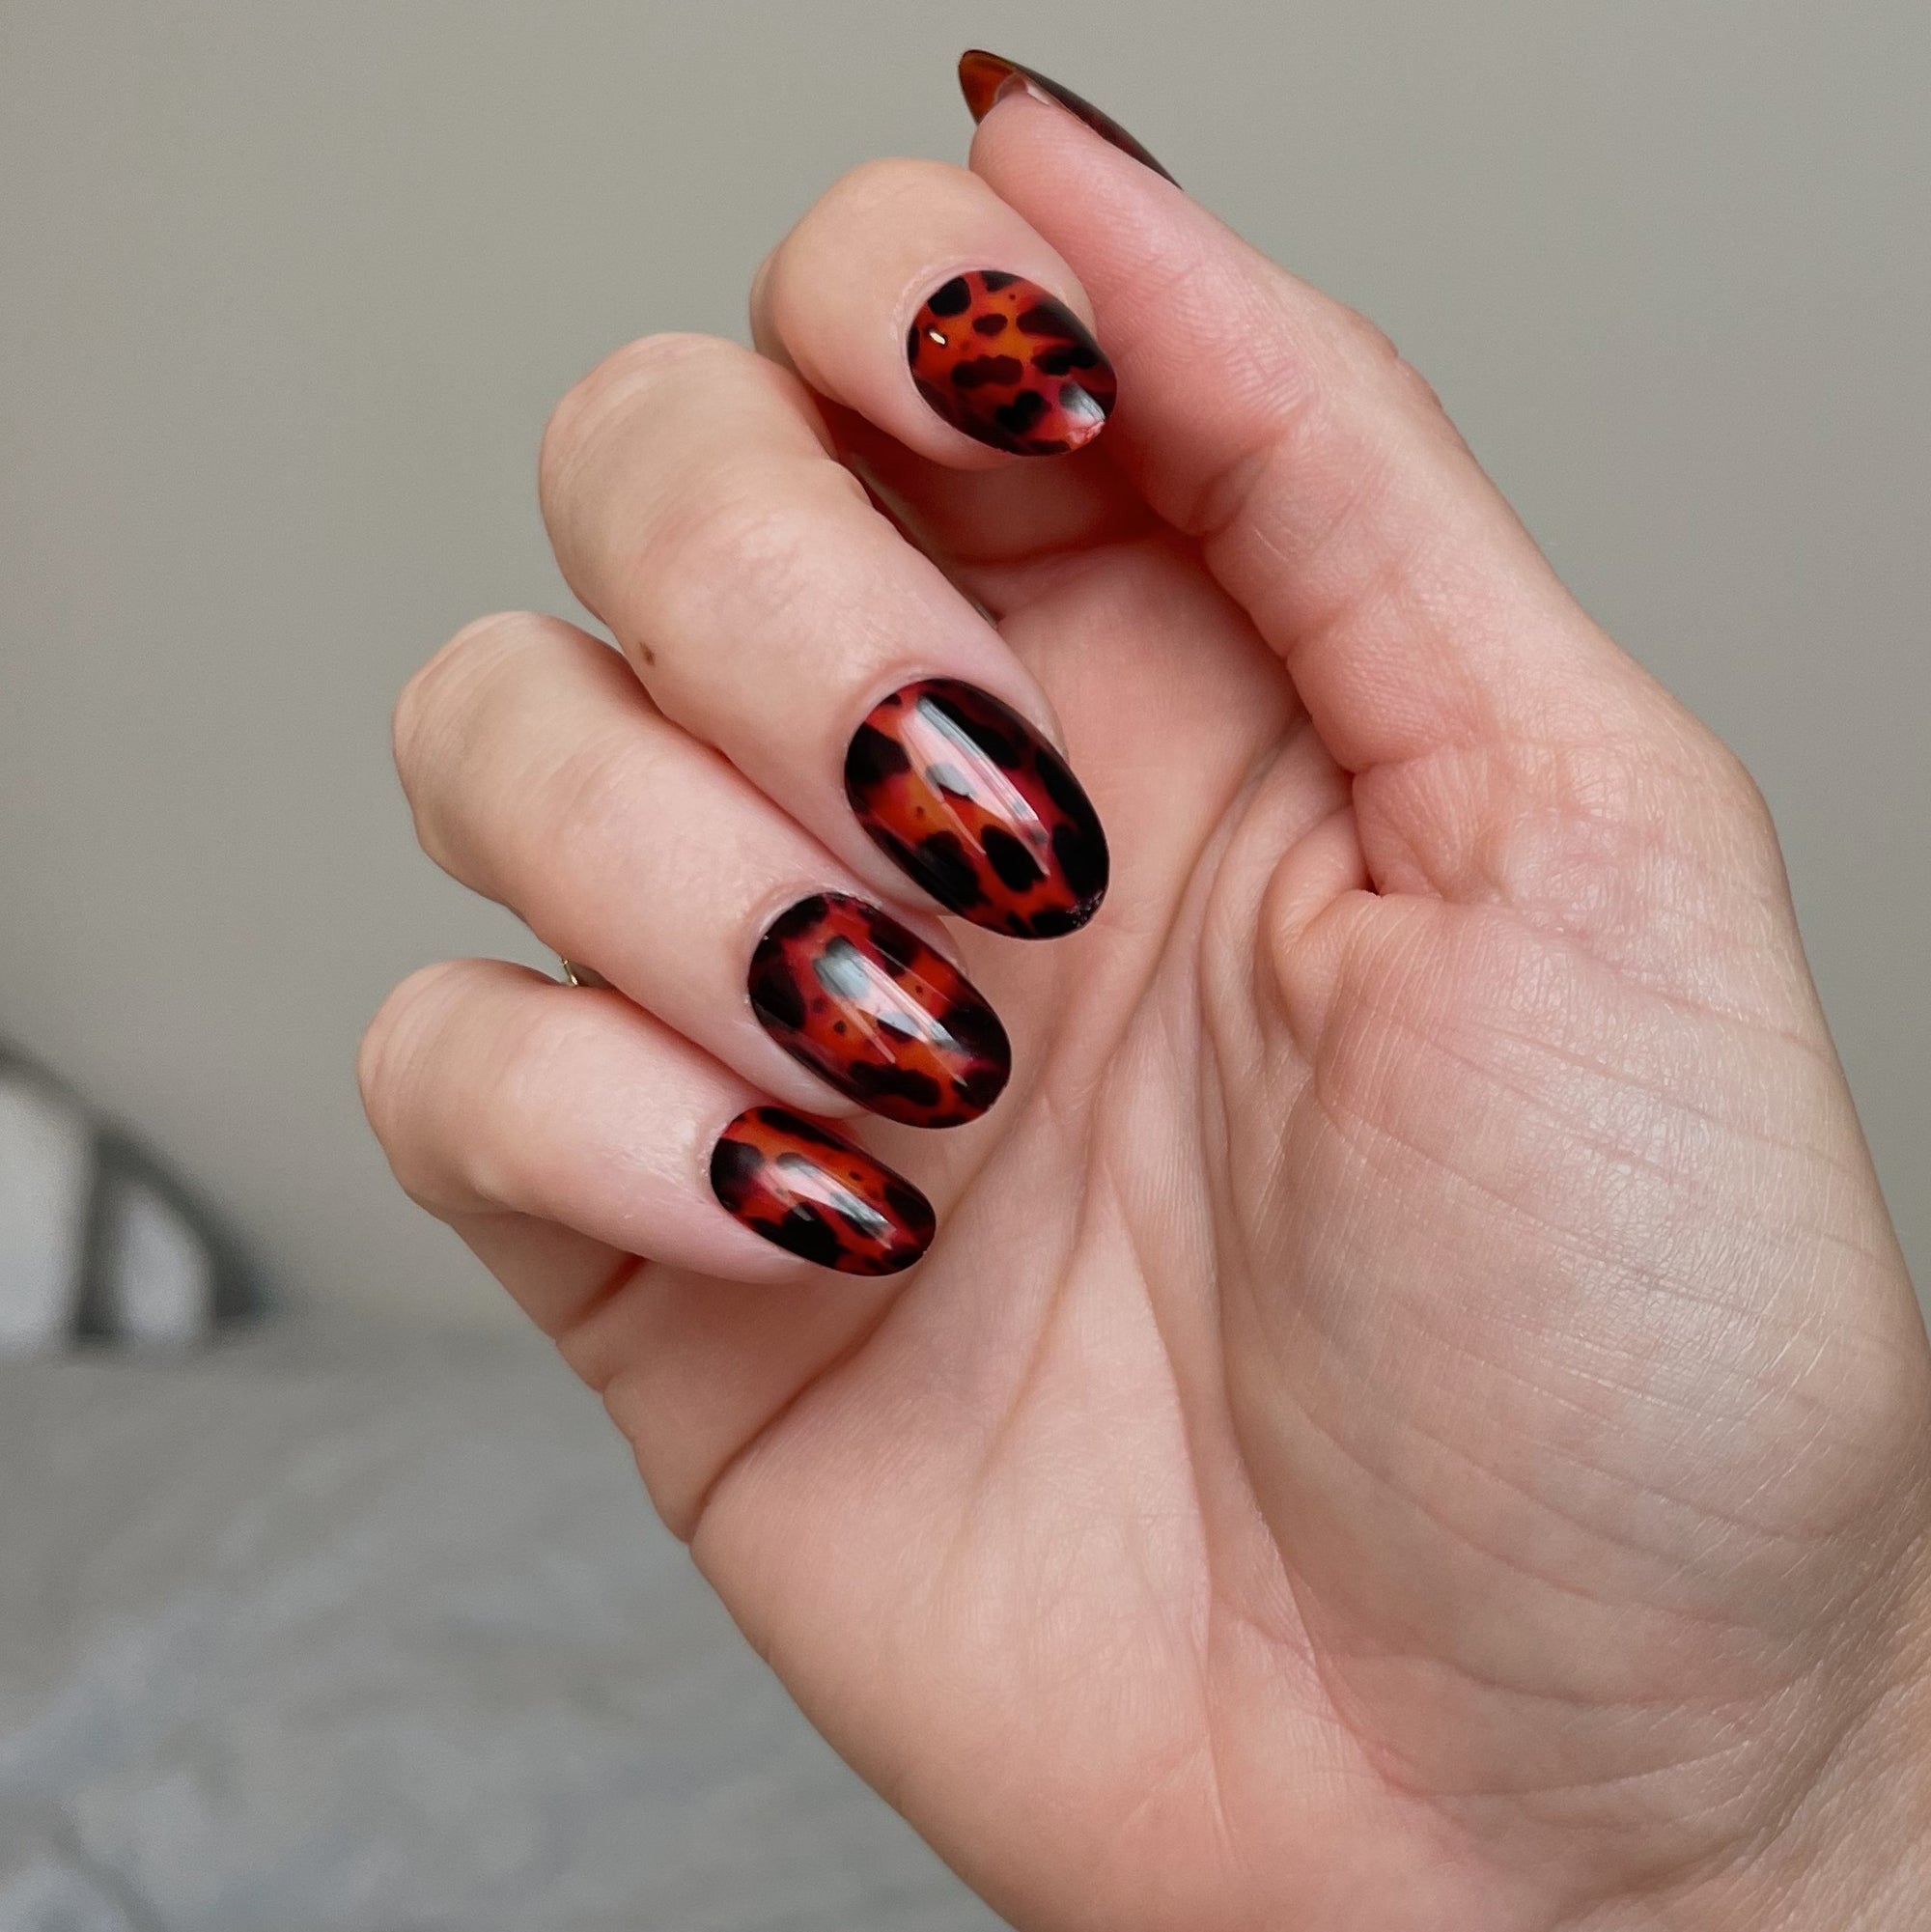
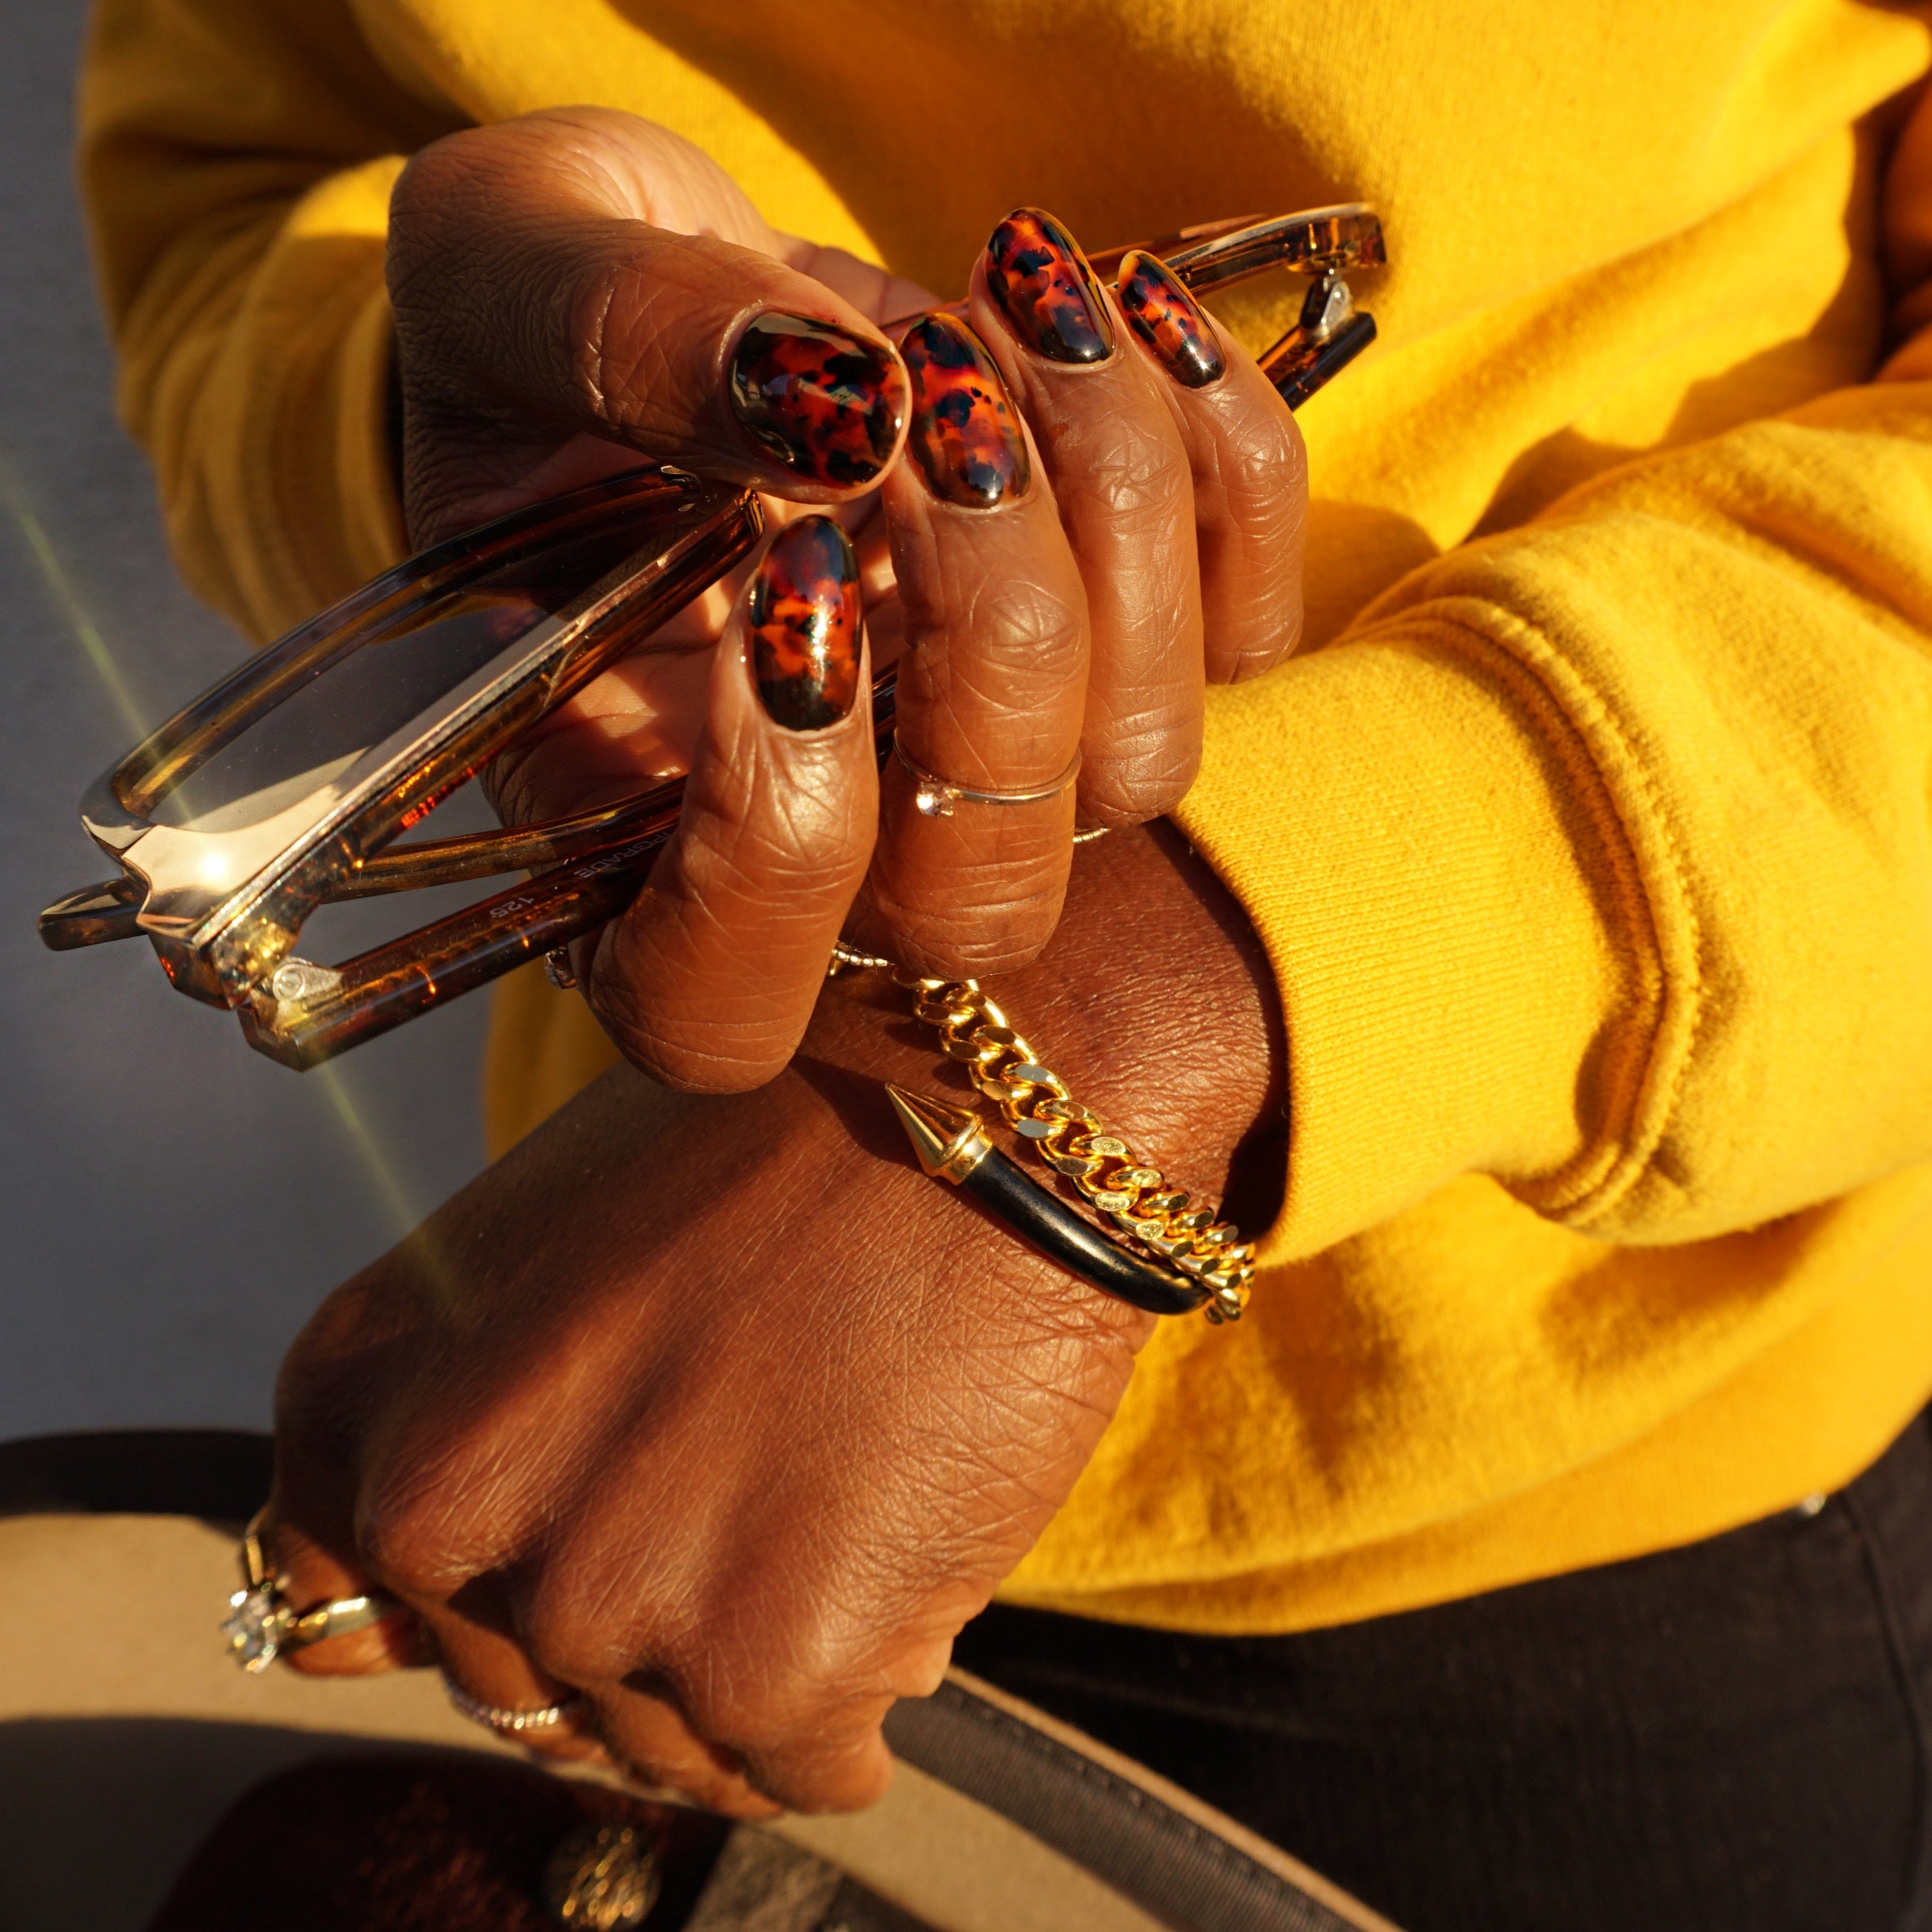
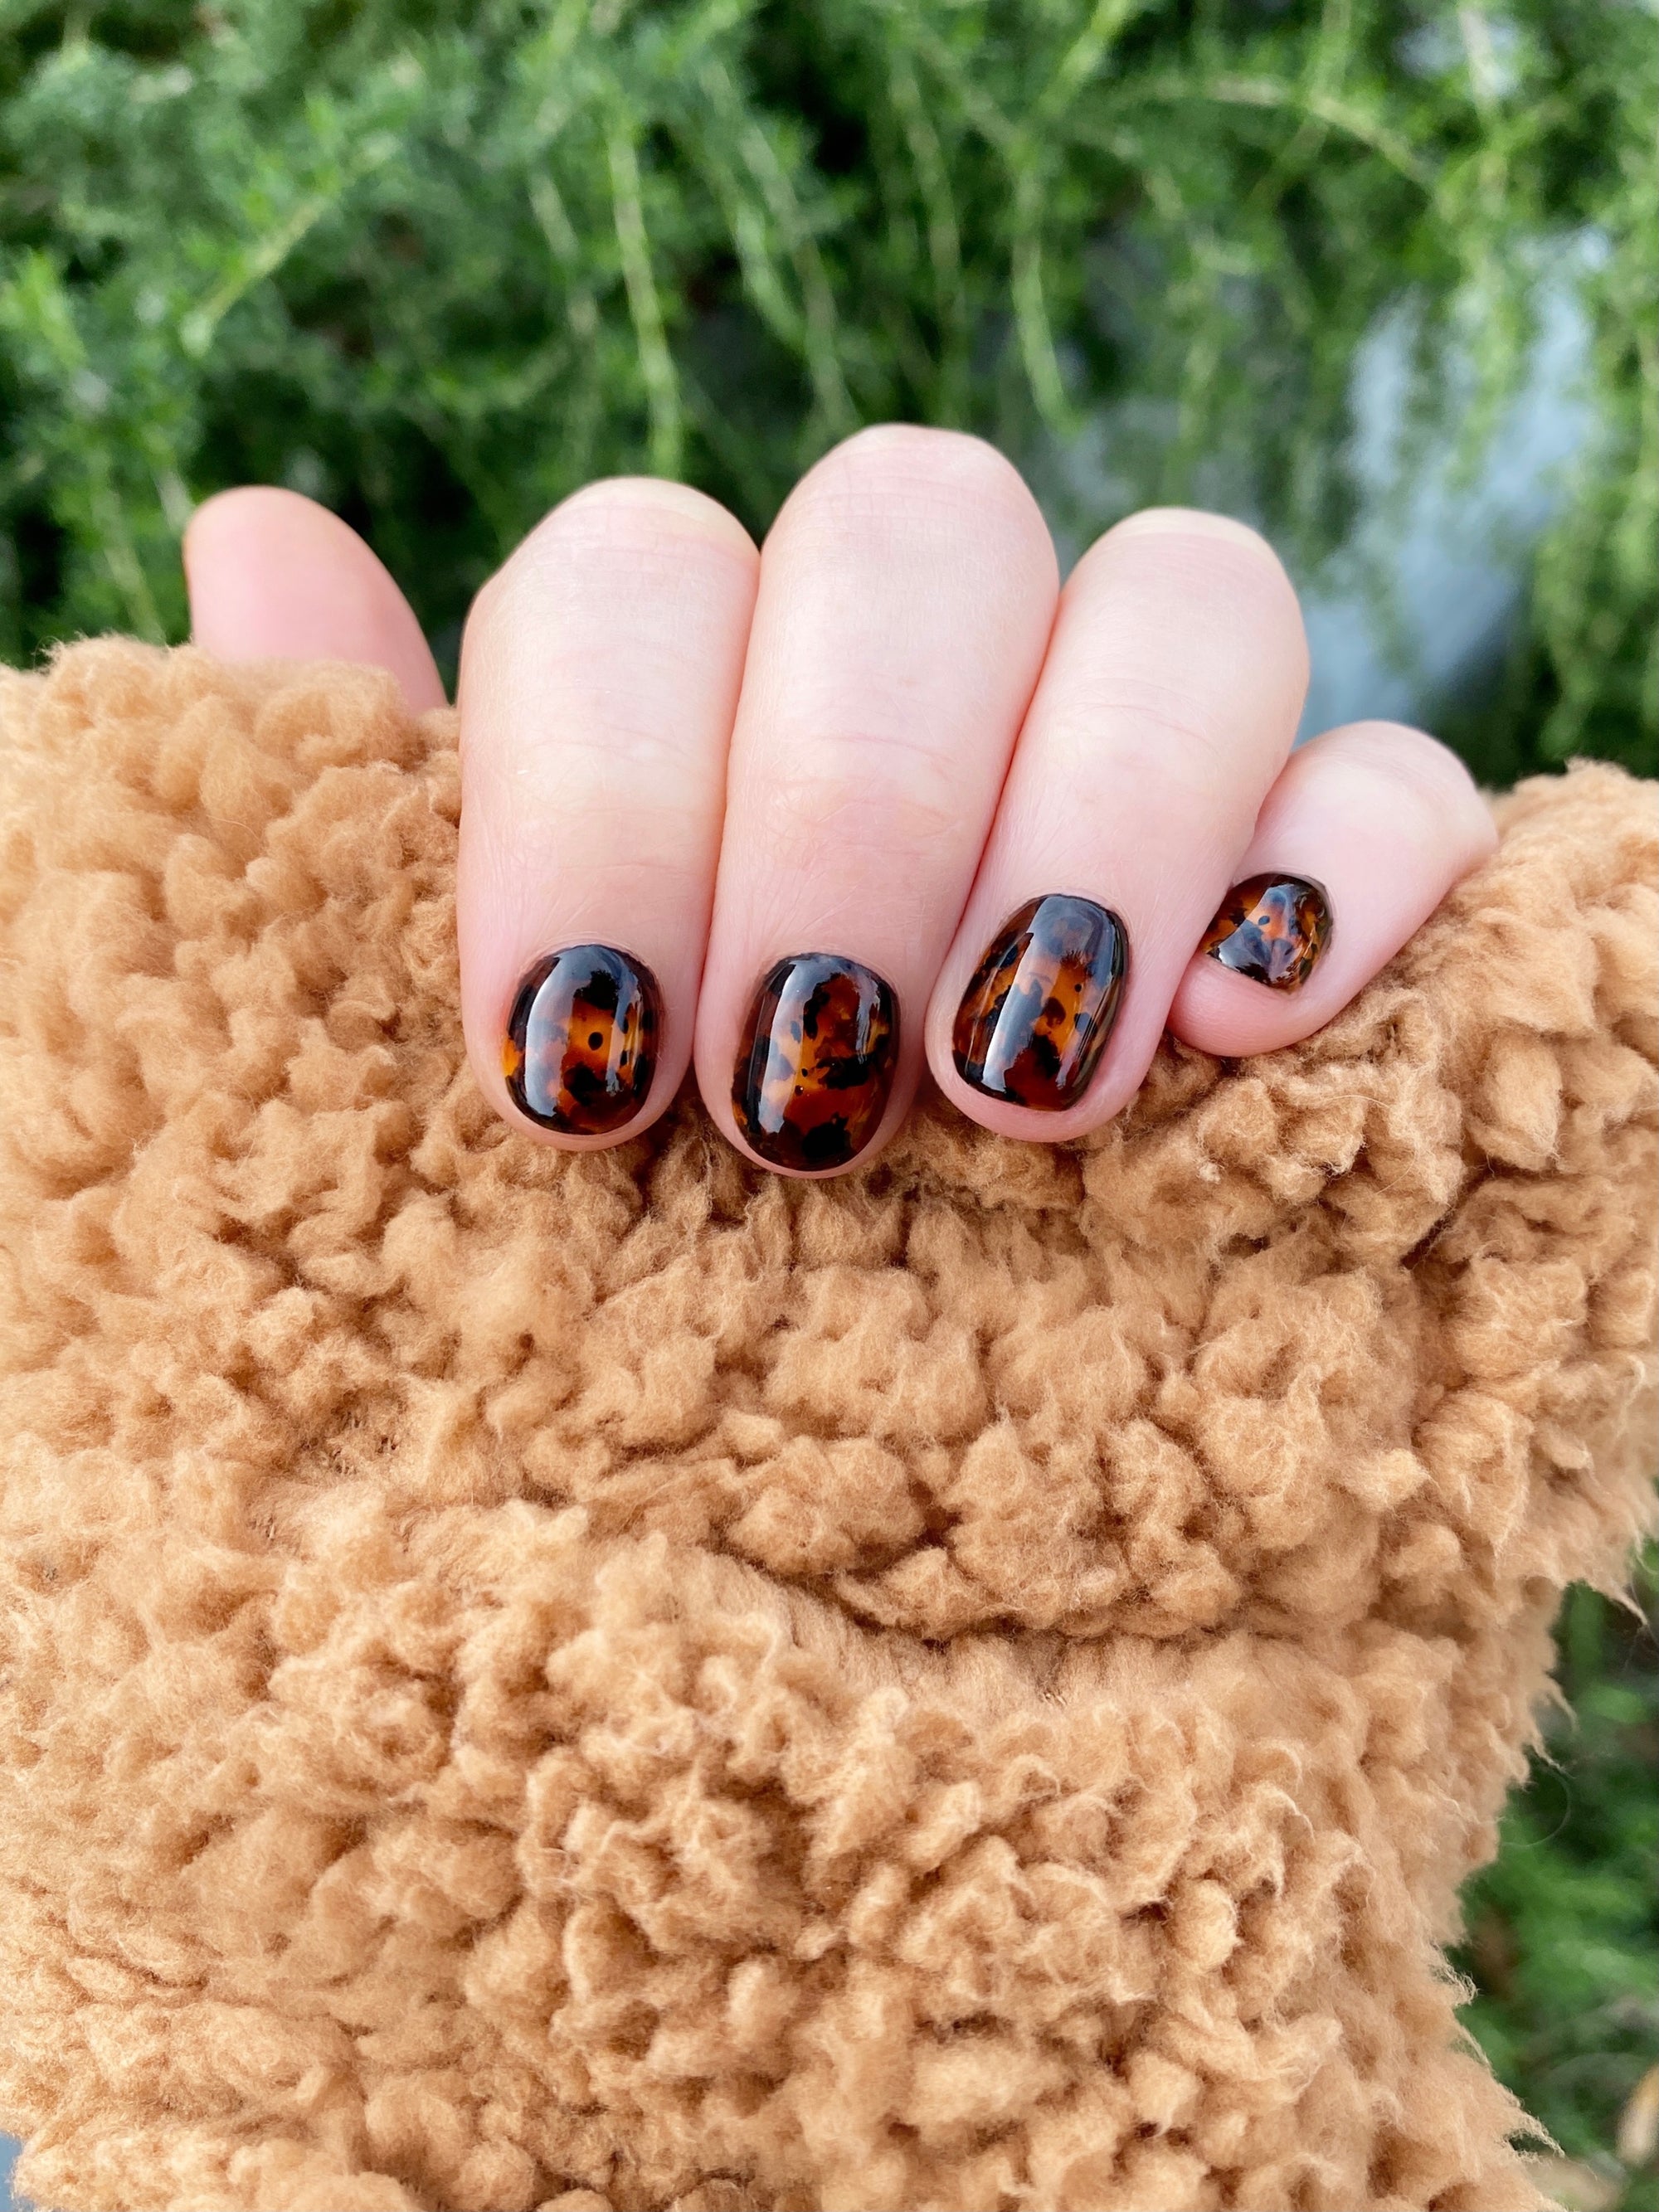
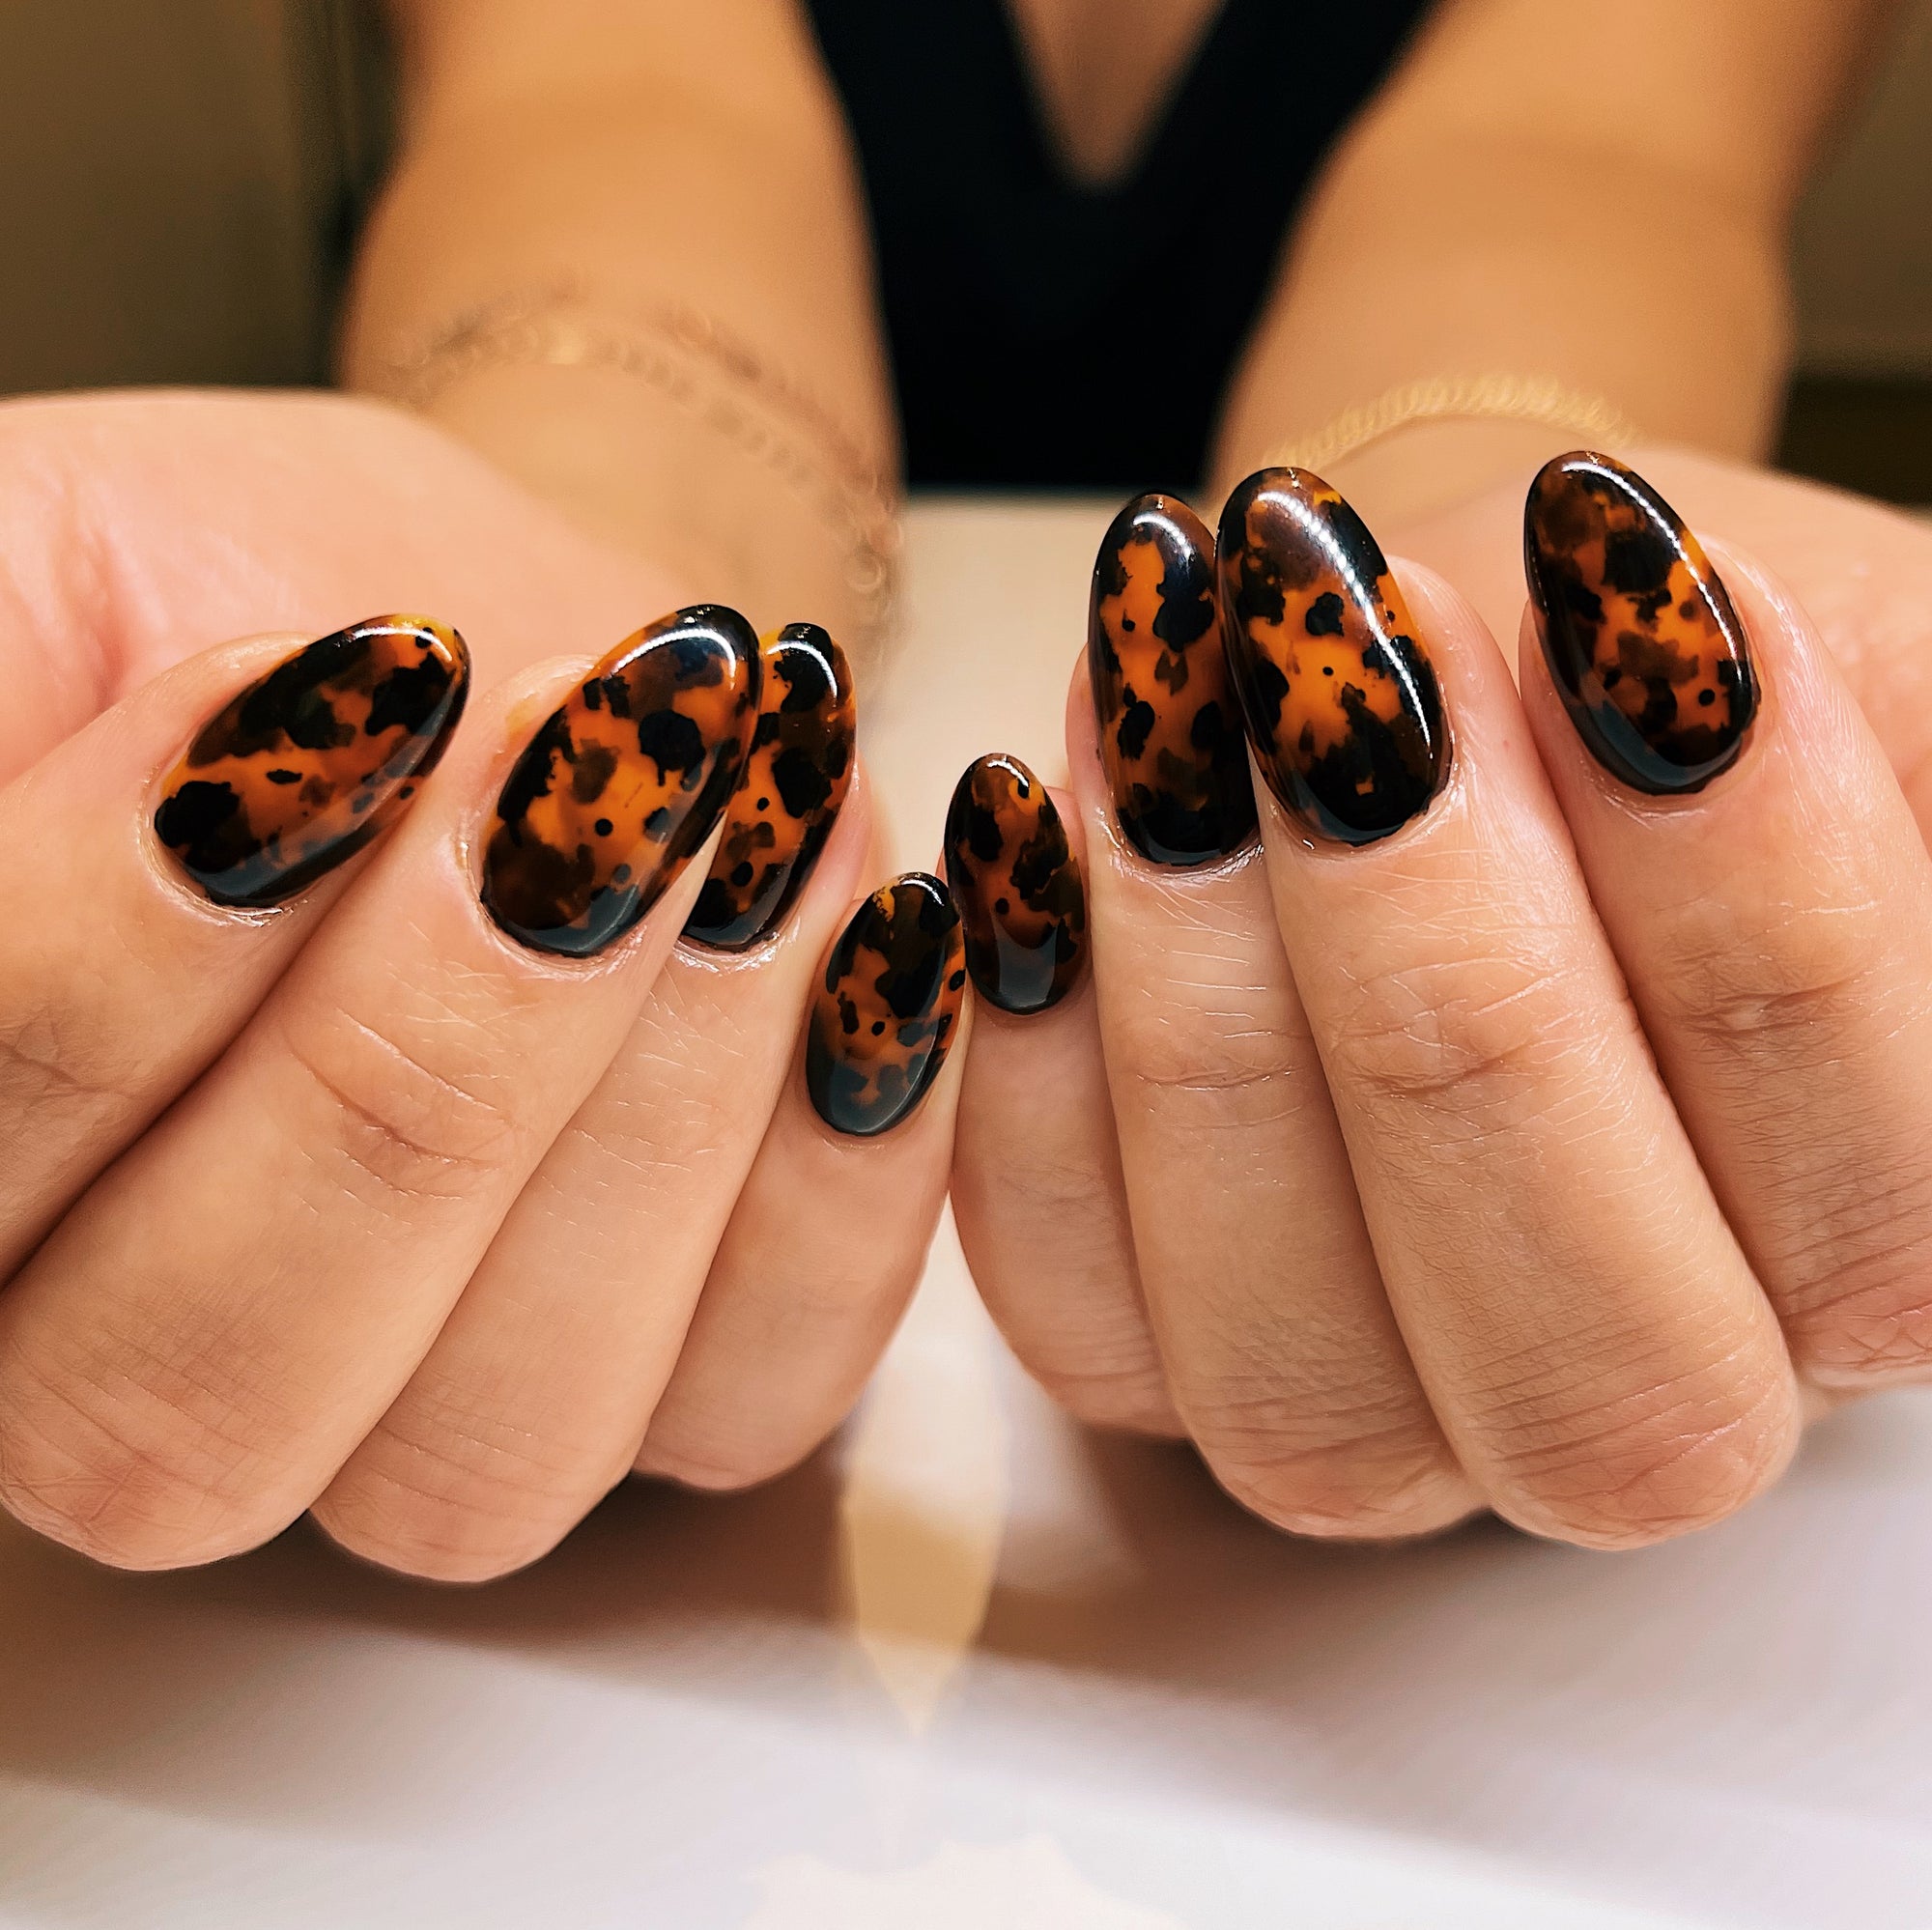
Abstract but not sloppy, neutral but not understated, this nail art design is perfect for Fall with its sophisticated, warm look.
It has definitely joined the ranks of cheetahs, marbles, snakes, and other nail prints that we love to see on our clothes, on our bags, on our shoes… and now on our nails.
It’s funny too, because if you really think about it, the design doesn’t really look exactly like a real tortoise's shell or even tortoiseshell cats, right?
But either way, we have somehow grown to love and accept it as its own thing! It’s cute. It’s classy. And many people want to get it on their nails now or learn how to do it themselves.
But just a single glance at it can make it a bit intimidating because it seems like a complex design to pull off. Of course, I mean, look at all the layers to it, how is it so glassy looking? Where do you even buy these really odd-looking colors? You might think it might be best left in the hands of the experts.
I have good news though! It’s not necessarily the design process that makes the tortoiseshell look so complex and real; it’s truly all about finding the right colors and tools to use to create the design!
So the question you might be asking is: How do I get the right tortoise shell design colors and design tools?
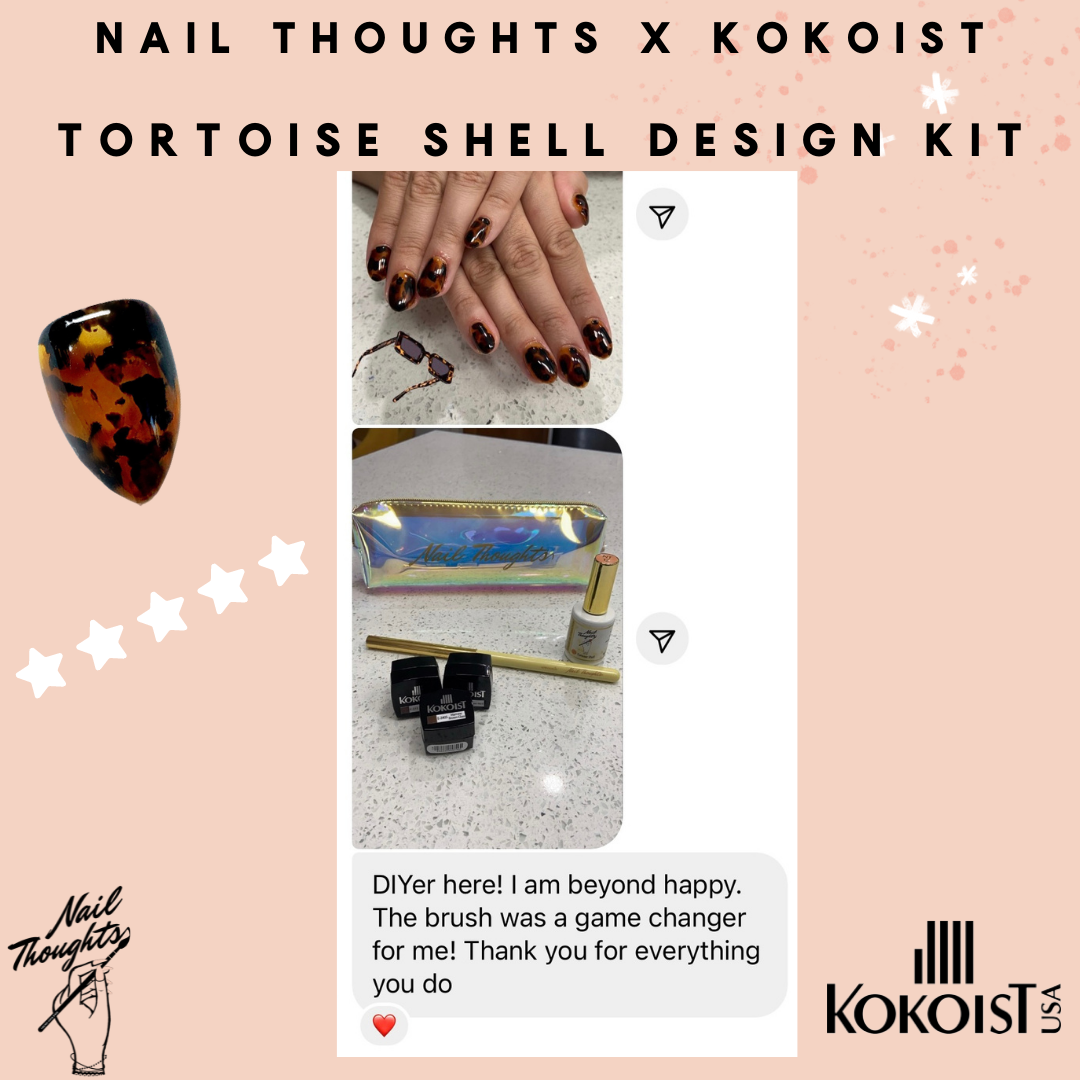
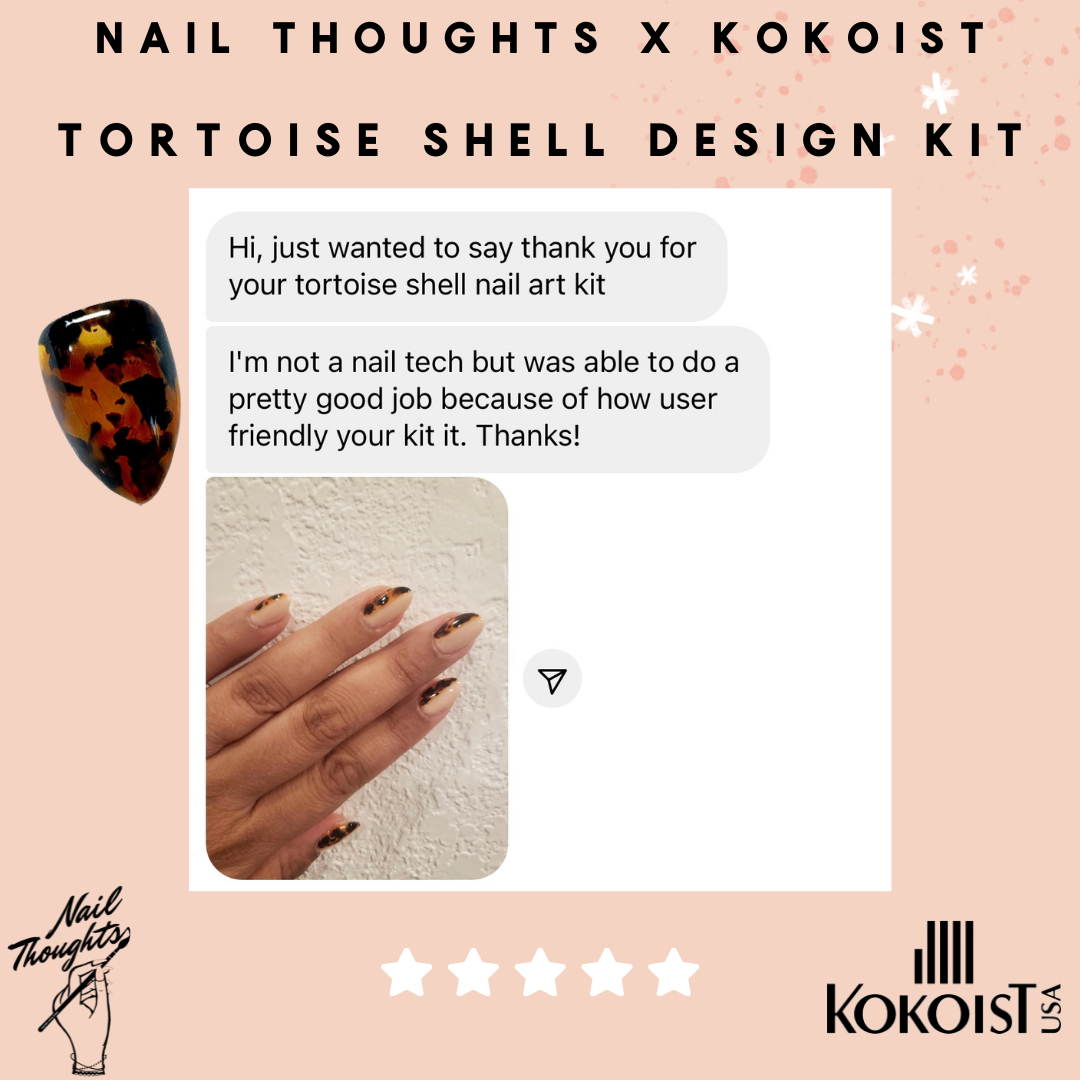
Well, look no further. I've officially created the best Tortoiseshell Nails Gel Design Kit for the nails of your dreams! YES! It’s an official tortie gel polish kit, now ANYONE can achieve this look.
The Tortoise Shell Design Kit
I can’t even tell you how proud I am of this nail kit.
First of all, I know the pains of finding the exact right colors for your tortoise nails. There are times when you have a specific color, a specific vision in your head... but it just doesn’t turn out the way you pictured it.
So often, for tortoise shells, it won’t look good without the right colors. So I came up with the perfect set of products that will ease your frustrations. With this design kit, you're ready to wow everyone with perfect nails and I can promise that you will nail the design EVERY time! The kit comes with a tutorial as well so literally, you are set up for complete success.
Click here for my easy tutorial on tortoiseshell nails!
What's Inside the Kit?
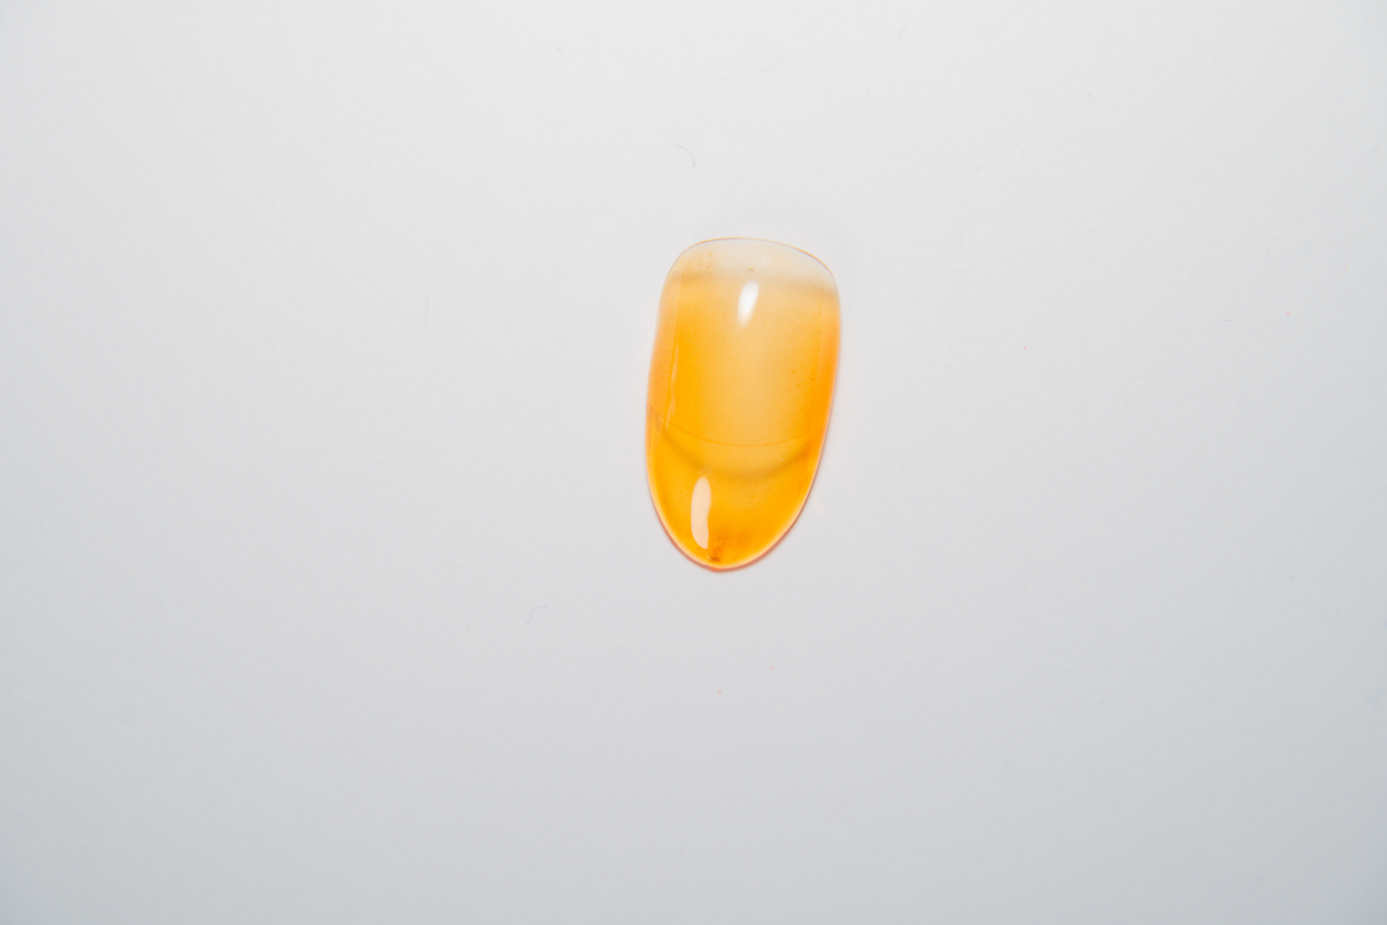
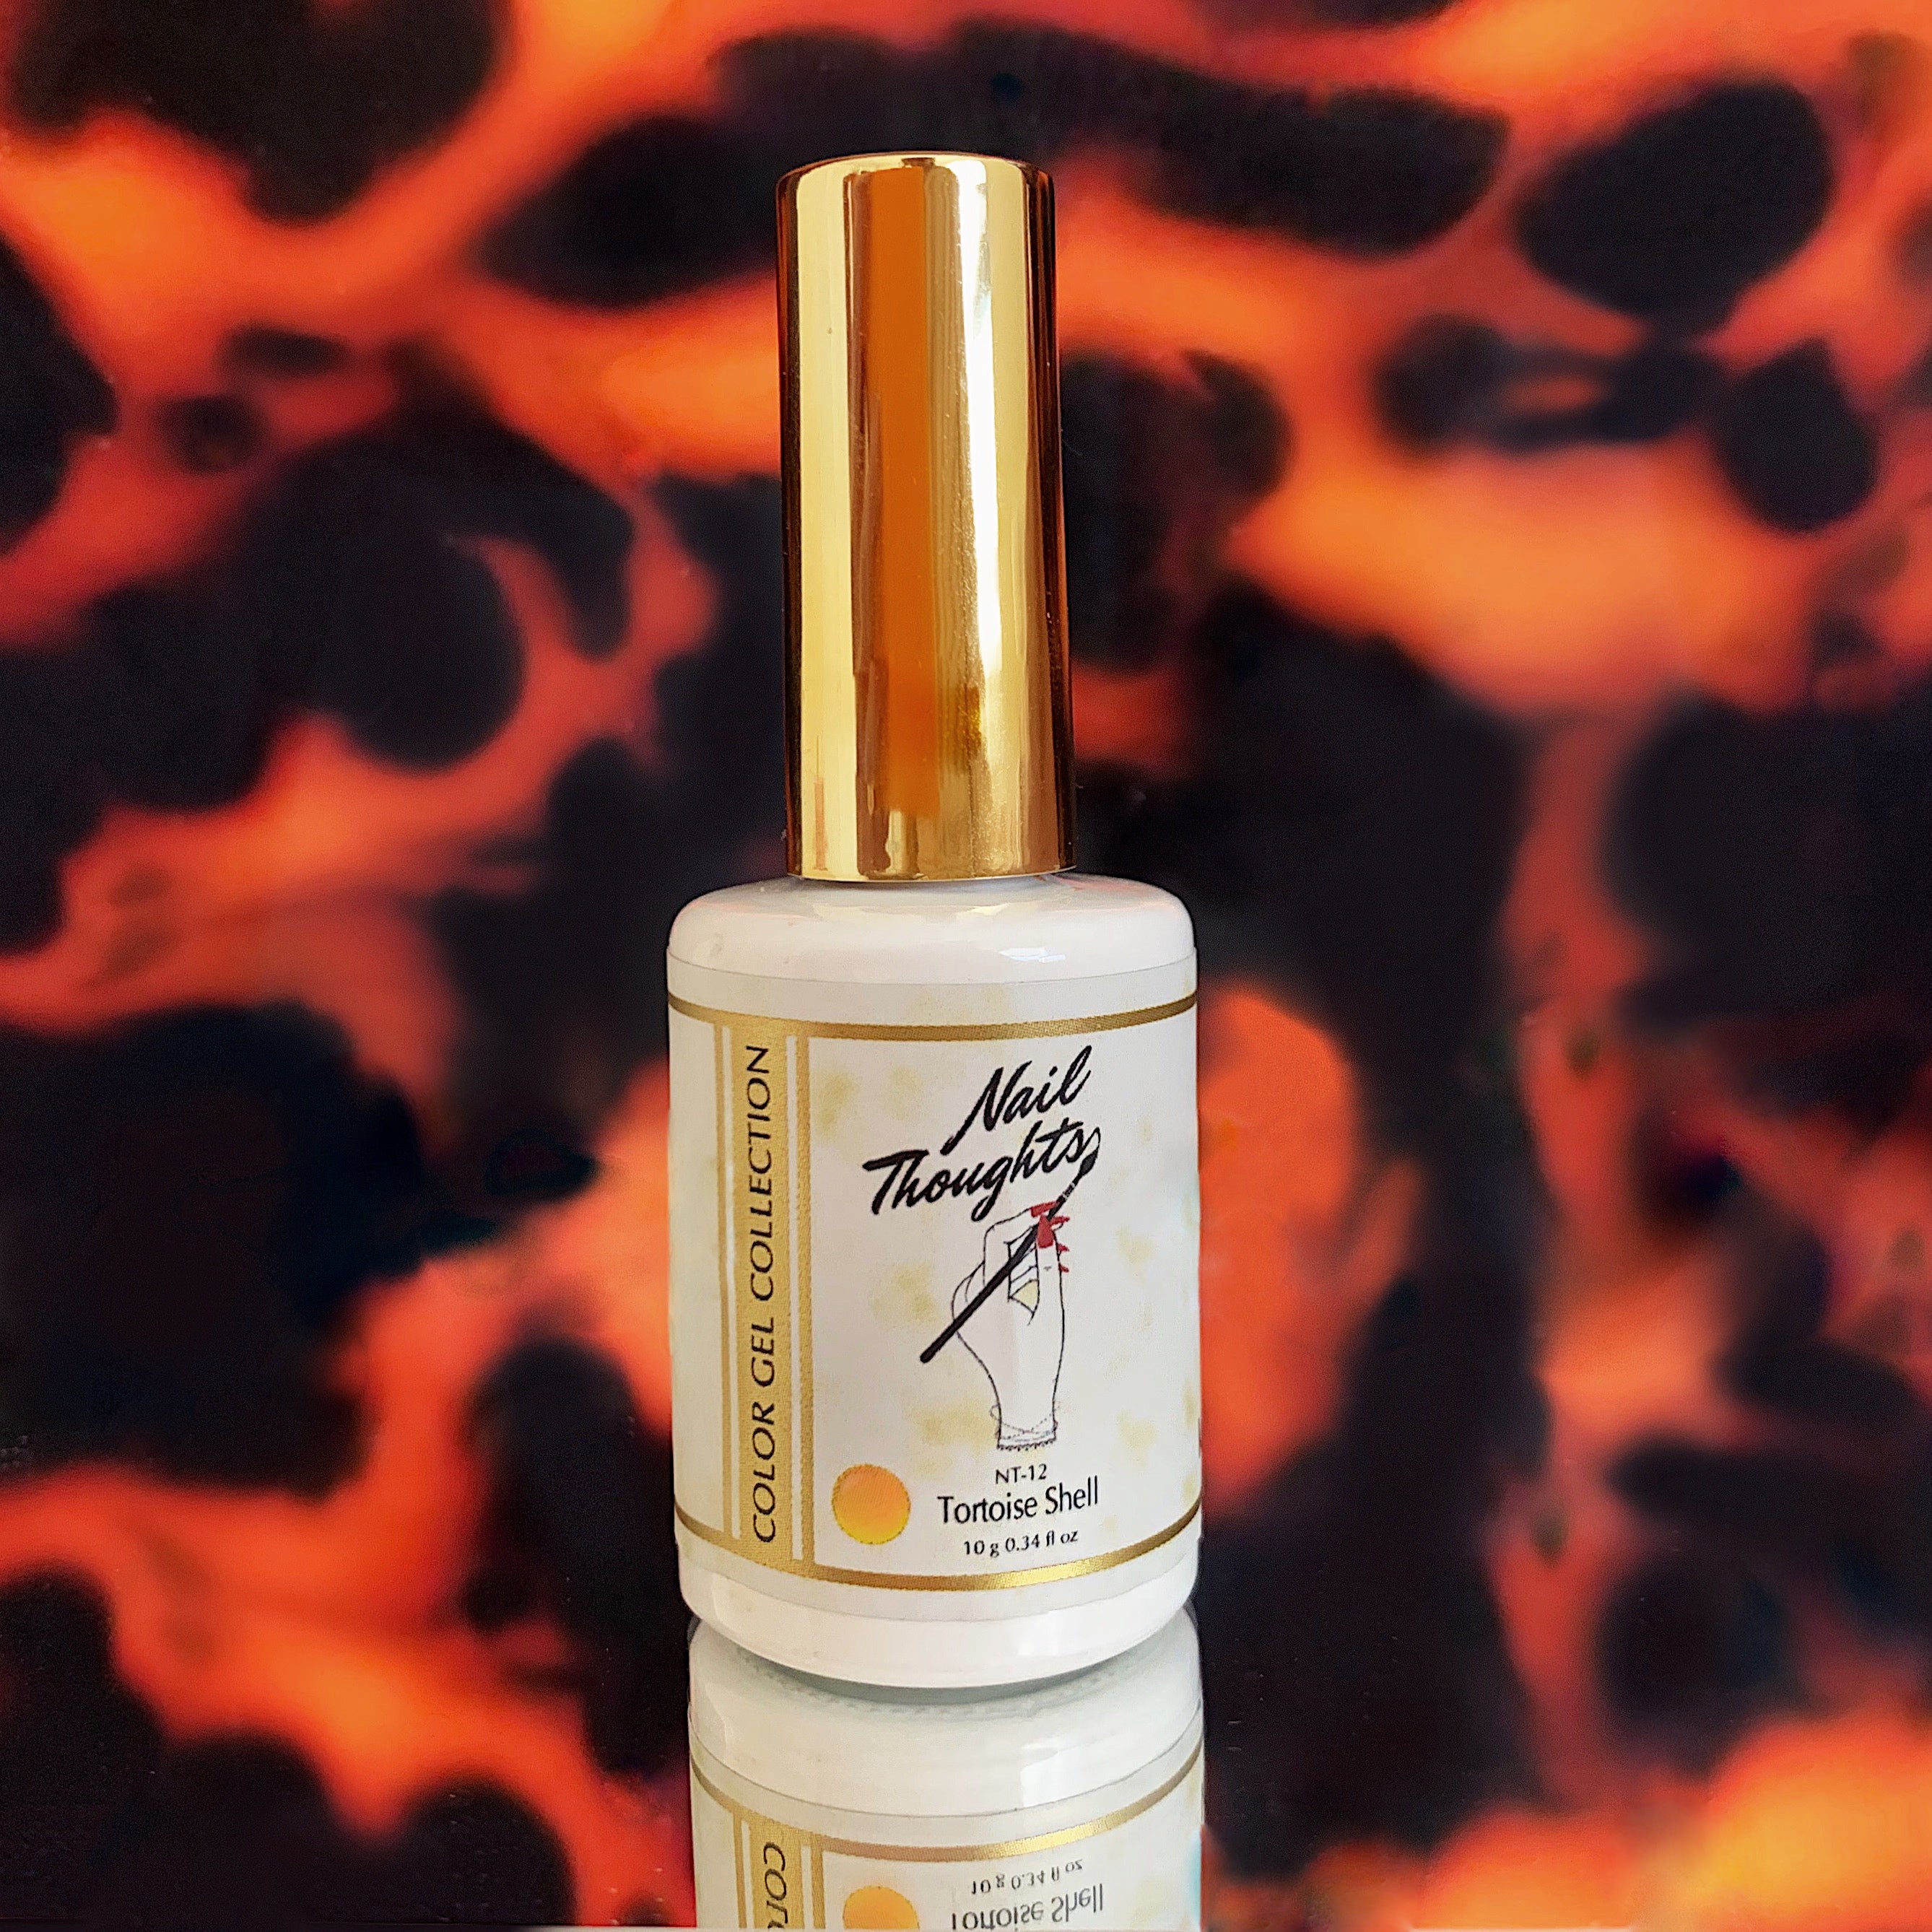
1. Tortoise Shell Color
The first step to creating a tortoiseshell pattern is applying a base coat color that can range from various shades of caramel-y to a bright, burnt orange and using a clear polish in between the color layers for that glassy blur. Mixing two colors to get just the right shade can be... tiring, to say the least.
But with this sheer glassy orange, you’ll be able to hit two birds with one stone! You can buy this color Tortoiseshell by itself as well, but I recommend getting the whole kit for maximum tortoise-ing.
With the perfect mix of orange and brown, it creates an amazing jelly effect that’s perfect for a layered tortoiseshell design. Once you put that first Tortoiseshell layer down, cure it and get ready for step two.
Bonus: You can also use it for amber or watercolor nail art!
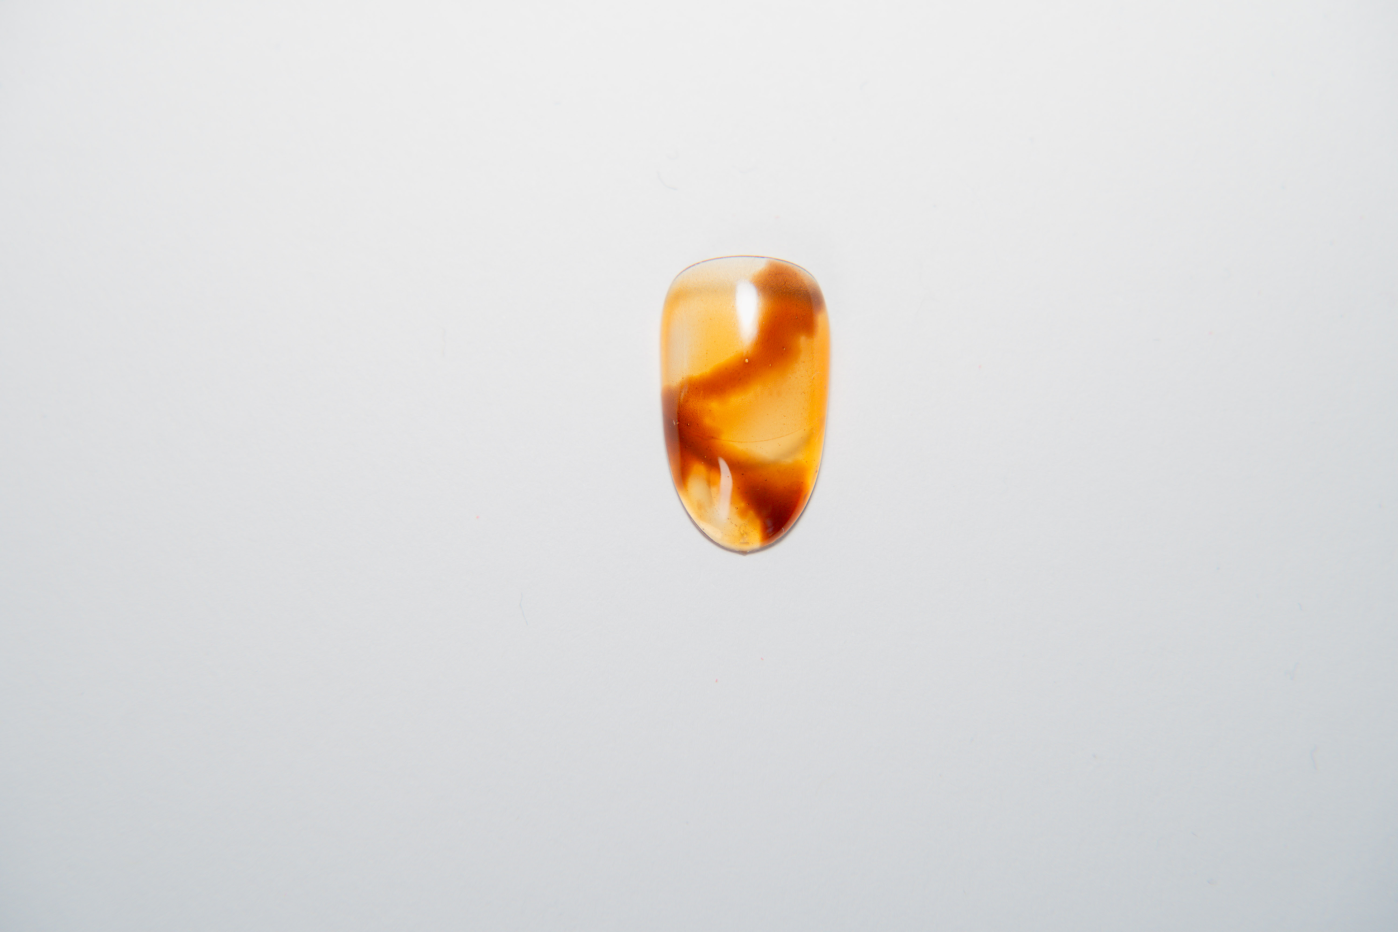
2. Marrone Brown Glass
Finally, onto creating the tortoiseshell pattern.
The Marrone Brown Glass has a deep espresso or chocolate color with hints of orange. You will want to artfully splotch it over the cured orange base. Again, there’s no specific technique or pattern to it — just go with your gut and let your artistic side take over!
No pressure on perfection, either. The thing about tortoiseshell is that it’s all about layering rather than precision, so you can’t really mess up. Just be careful not to cover up any of the base orange. Once you’re happy with it, cure it!
3. Midnight Chocolate
Compared to Marrone Brown Glass, Midnight Chocolate is a deeper, more opaque shade. It definitely adds a little more oomph to your layering.
Apply it in random blobs as well.
Some would even call the blobs "haphazard", and there's really no need to be too careful with it. Don't overthink about where to position the blobs and their sizes. Once those blobs are placed, cure again!
Again, just remember to overlap the layers, not cover them. The main feature of tortoiseshell, after all, is that each color should be peeking through so that they’re not overshadowed or hidden beneath the other layers.
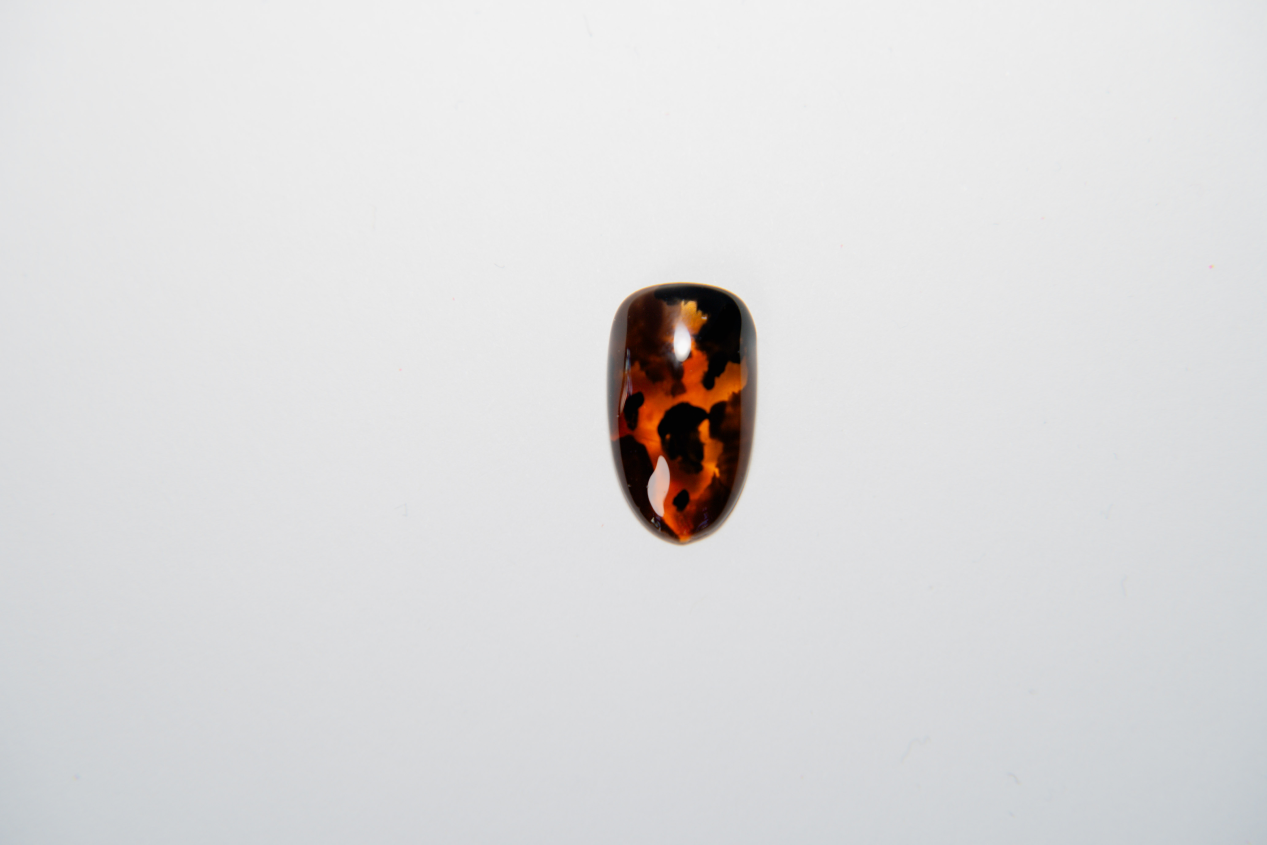
4. Blackest Black
For the final touch, use Blackest Black to amp things up.
This pitch-black color will give the brown hues more depth. Place the small black patches randomly over the entire pattern. Fill in any empty spaces with the black, too.
And then, voila!
You've got yourself the perfect tortoiseshell nails.
BONUS: If you want anything on the Kokoist website, you can always use the code NT10 to save yourself a little money!
5. Smoosh Brush
Creating those intricate blobs that define tortoiseshell wouldn’t be possible without the right brush.
Thankfully, the Tortoise Shell Nails Gel Design Kit includes this smoosh brush!
As you can see, the brush is really tiny and rounded out. Perfect for smooshing details into finer sections, lines, smears… whatever you need!
In decorative painting, smoosh brushes are used for blending, smudging, and tinting. True to its name, this handcrafted brush from Japan is just perfect for smudging and softening lines.
In this case, it’s perfect for smooshing down those abstract blobs that will help you nail (pun intended) that perfect tortoiseshell look!
6. Nail Thoughts Case
Want to know one of my favorite things about the Tortoise Shell Gel Design Kit?
It also comes with this totally cute holographic Nail Thoughts Case, too!
Topping It Off
Note: Top coat does not come with the tortoise shell design kit. The last thing you would want is for the tortoise shell nail colors to chip and dull, ruining your hard-earned masterpiece.
When you go to a salon, usually they would apply a top coat gel to protect the color from the environment.
This topcoat gel has a slightly thicker consistency to seal all your brush strokes. Use it for that smooth, clean finish for your tortoiseshell nails.
Before You Get Started
Having the best Gel polish for nails is the most ideal for tortoiseshell nail art. However, when using gel polish, there are certain things you have to remember.
I've written a more detailed post about the common gel mistakes you might be making, but here are the basics of what you need to remember:
- Don't expose your nails to water prior to painting them!
- Gently buff your nail with a file so that the gel doesn't peel off.
- Gel polish hates dead skin, so get rid of it.
- Absolutely do not cure the gel while it's still flooded.
- LED or UV curing lamps work best for gel polish.
With that out of the way, you're finally ready to dive into the best products for getting your dream tortoiseshell that will have everyone ooh-ing and ahh-ing over your luscious nails.
Some More Things To Remember For Tortoise Shell Nails
Now that you know which products and shades you need for tortoiseshell colors, here are some pro-tips for beautiful glossy tortoiseshell nails:.
Use sheer or jelly polishes.
For tortoiseshell nail art designs, normal nail polish just won’t cut it.
Sheer or jelly polishes give it a more realistic glassy texture. If you’re gunning for a cool transparent look, feel free to experiment with less blobs and more of the first layer peeking through!
Beauty lies in imperfection.
As I’ve already mentioned, there’s no need to worry about being perfect.
There’s no specific rhyme or rhythm to the tortoiseshell design and coloring. There’s always a little wiggle room for error, so don’t panic if you think you messed up a brushstroke or put too many blobs. You can always work around it as you’re applying the layers.
Don’t stress about precision and let your personality shine through. Have fun!
Less is better.
Fewer spots actually look better on the nail surface than too much. You don’t want to make it look crowded or messy. It might also risk the design looking more like a cheetah than a tortoiseshell, so try to keep around 2-4 spots per nail.
Wrapping It Up
Tortoiseshell nail arts are all the rage — and understandably so.
Gracefully tiptoeing the line between excess and subtlety, it’s the perfect go-to for any outfit and occasion. Though it's most commonly associated with fall because of its warm and cozy vibe, it also goes well with winter.
If painting your whole nail seems too over-the-top, you can even paint only half vertically or horizontally. The plain space gives it a little bit more flair and adds more emphasis to the design.
Don’t be afraid to be messy with it, too. Believe it or not, messy makes it look more natural — and that makes it look cuter and more artistic! It’s like having your own painting and carrying it around on your fingertips everywhere you go… so let loose and feel free to express yourself!
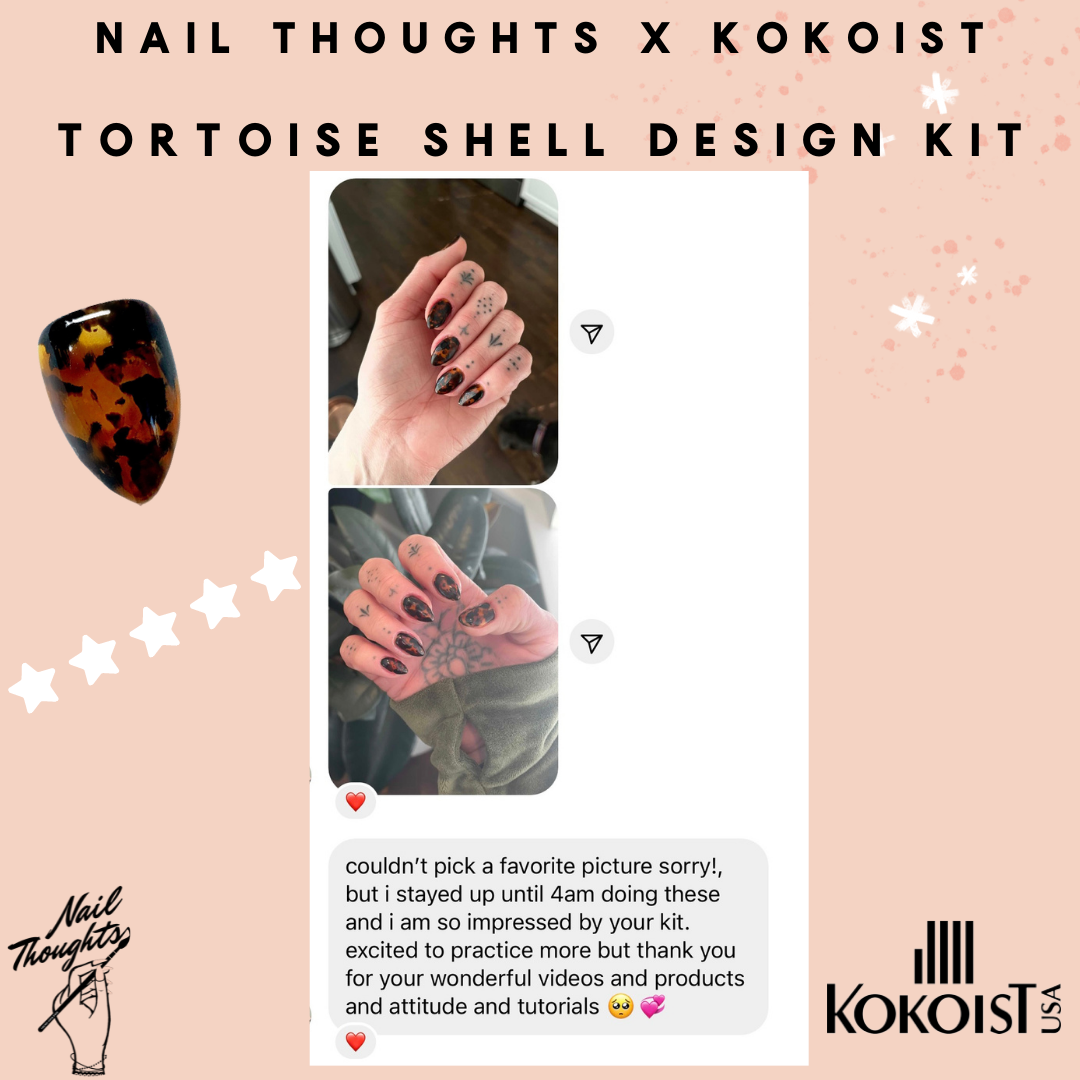
Lastly, don't forget to tag me on Instagram https://www.instagram.com/nailthoughts/ when you're done with your tortoiseshell creations using my kit! Can't wait to see you with your cute nails!
What's included?
These colors layered and smooshed together will create the perfect glassy and natural tortoiseshell nail art of your dreams and make your life so much easier!
INCLUDED IN KIT:
NT-12 TORTOISE SHELL
E-148 BLACKEST BLACK
E-223 MIDNIGHT CHOCOLATE
E-240S MARRONE BROWN GLASS
SMOOSH BRUSH
NAIL THOUGHTS CASE